A ceiling-hung decorative panel screen runs $60 in materials and about three hours if you work carefully, or $20 plus an afternoon if you start with a secondhand frame and stretch painted canvas across it.
Most people anchor the ceiling hooks without checking alignment first, which leaves the panels hanging crooked.
The O’verlays panels arrive painted white, and you can leave them that way or spray them a darker color before you drill the screw eyes into the top edge and hook them onto ceiling-mounted cup hooks.
1. Paint the Panels if Desired

The O’verlays panels arrive painted white, which works if you want a clean, modern screen or plan to leave the decorative pattern as the focal point.
I’ve found that painting them before assembly gives the best finish, since you can reach every corner of the pattern without working around hardware or having to tape off adjacent panels.
Spray paint covers the detailed cutouts more evenly than a brush, and it dries fast enough that you can flip the panel and hit the back edges in the same session.
If your room leans warm, a soft taupe or cream keeps the screen light but pulls it closer to the rest of the palette.
Darker shades like charcoal or navy turn the screen into more of a statement piece, especially if the rest of the space is neutral.
Two coats usually do it, and the whole step adds maybe thirty minutes per panel once you account for drying time between coats.
2. Install Screw Eyes on the Panel Top Edge

Place two screw eyes on the top edge of each panel, one inch in from each outer edge.
The ¾-inch size threads in securely without splitting thinner panels, and positioning them an inch back keeps the hardware clear of the edges where paint or finish tends to chip.
If you’re working with panels wider than twelve inches, add a third screw eye centered between the two outer ones so the weight distributes evenly and the panel hangs flat instead of sagging in the middle.
I thread each screw eye by hand at first, then finish the last few turns with needle-nose pliers if the wood resists.
The eyes need to sit perpendicular to the top edge so the panel hangs straight when you hook it to the ceiling anchors later.
A screw eye that angles forward or back will tilt the whole panel and throw off the vertical line you want.
3. Install Ceiling Anchors the Same Distance Apart

Place the drywall anchors in the ceiling the same distance apart as the screw eyes you just installed on the panel.
A framing square will help keep the anchors aligned with one another so the panel hangs straight rather than canted to one side.
The ceiling placement matters more than it looks like it should: panels hang from these points, and if the anchors drift even half an inch out of line, the tilt shows immediately.
Your panels should sit about 1½–2 inches shorter than ceiling height to leave clearance for the hardware and keep the bottom edge from dragging.
With 8-foot ceilings, that puts panels at 94⅛ inches tall. Mark the anchor positions carefully before you drill, because drywall does not forgive a second attempt in the same spot.
4. Attach Cup Hooks and Hang the Panels

Once the cup hooks are in, hanging the panels is entirely mechanical. Screw a 1-inch cup hook into each anchor until it sits tight against the ceiling.
The hook should point in the direction you want the panel to hang, which usually means perpendicular to the wall if the screen runs parallel to it or straight out into the room if the screen divides the space down the middle.
Line up the screw eyes on the panel’s top edge with the cup hooks, then lift and slide each eye onto its hook.
The panel hangs by gravity alone, which means you can lift it off the same way when you need to move it or take it down for storage. No tools required once it’s up.
5. Prepare the Existing Divider Frame
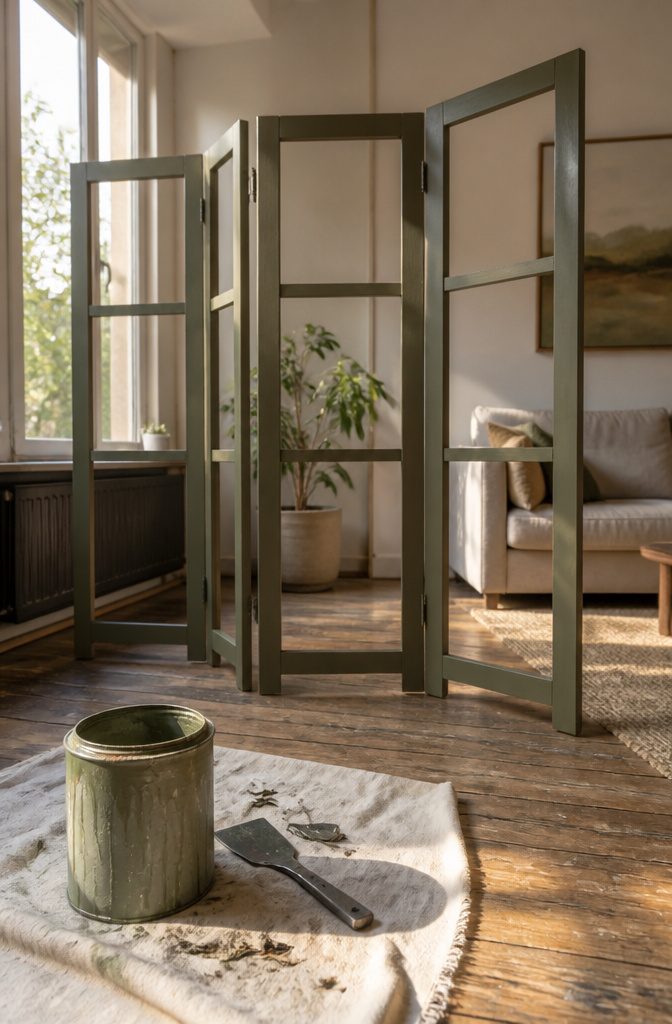
The secondhand frame cost $20 and arrived full of old fabric backing, dried adhesive, staples, and dust that all had to come out before I could start.
This part took longer than I expected. The paper tore in pieces rather than peeling cleanly, and some of the glue needed scraping with a putty knife to come off completely.
I worked through it methodically, checking both sides of each panel to make sure I caught every staple and scrap.
Once the frame was bare, I decided to paint it. The original finish was scuffed and didn’t match the room, so a fresh coat made sense.
I let the paint dry overnight before moving on—touching it too soon would have left marks in the finish, and I wanted the frame looking clean when the new fabric went on.
6. Set Up and Mark the Canvas Without Cutting

I tape 2 yards of white fabric over a tarp on the floor, mark the screen dimensions in pencil, and draw vertical lines where the panels will divide without cutting anything yet.
The tarp matters more than it looks like it should.
A wall seems convenient until paint soaks through the canvas and you’re repainting drywall. A drop cloth on the floor or a tarp hung on the wall keeps the work surface intact.
Once the fabric is down, I tape off the vertical panel lines with duck tape.
Horizontal edges stay open for now. The tape gives clean borders when the paint goes on and keeps each panel visually separate.
Marking everything first means the measurements stay accurate across the whole screen, and taping before paint means no guessing later where one section ends and the next begins.
7. Sketch and Paint the Design

Start by sketching a loose outline of where the tree trunk and main branches will sit, using either a pencil or artist chalk.
The grid on your screen hides minor wobbles, so don’t worry about precision. If you’re nervous about going straight to the canvas, practice the general shape on paper first to get a feel for the composition.
Once the outline is down, paint the trunk and branches with a 2- or 4-inch brush. Broad strokes are your friend here, and the Impressionist style of cherry blossoms means you’re creating an illusion rather than rendering botanically accurate petals.
Switch to your blossom colors and apply them with the same wide brush, using big splotchy strokes to suggest clusters of flowers rather than painting individual blooms.
Acrylic is forgiving, and the lack of fine detail is what makes this design work.
Save the small brush for the very end, and only if you want to add a few twigs or curls for realism. Most of the screen stays loose and painterly.
8. Mist the Paint if Desired

This step is optional and irreversible, so practice on scrap canvas first if you want to try it. You’re after a soft watercolor blur where painted edges melt into the fabric, and once the mist hits there’s no reversing it.
Your paint should be close to dry but not completely set when you mist.
The drier it is, the less it will blur, and keep in mind that the paint continues to spread as it dries even after you stop spraying. A light touch matters here.
Set your spray bottle to fine mist and spray from about 12 inches away.
Do not soak the canvas; add just enough moisture to let the paint edges soften, then step back and let it work. The effect builds as the fabric absorbs the water, so resist the urge to add more right away.
9. Dry the Canvas Completely Overnight
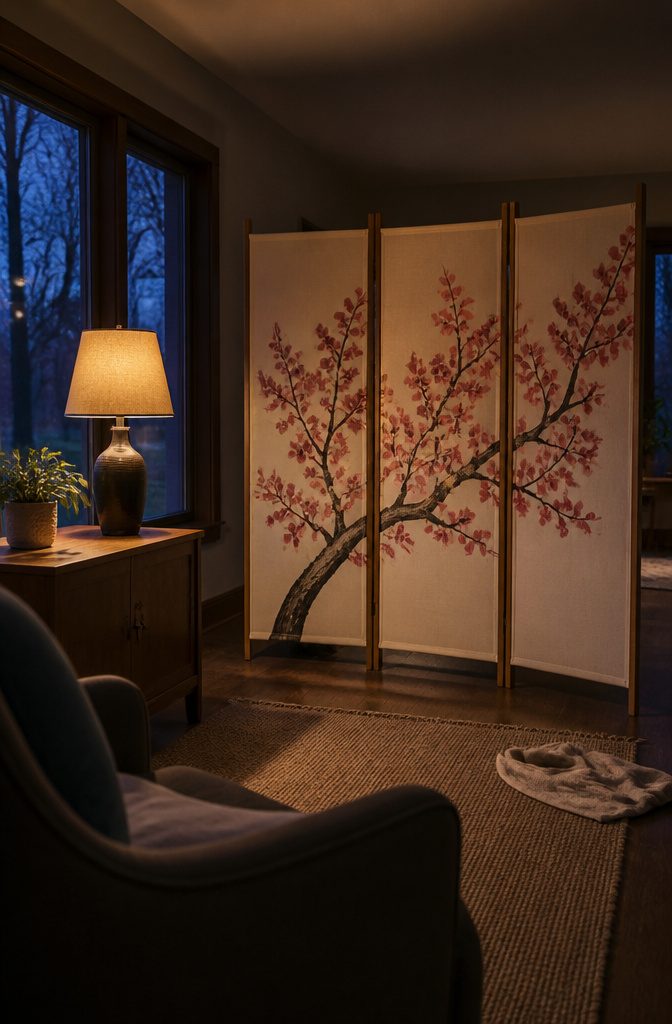
Leave the painted canvas hanging overnight, wherever it is. This is not optional.
Paint feels dry to the touch long before the canvas underneath has released its moisture, and pulling it down too early leaves you with damp fabric that wrinkles when you fold it or develops mildew if you seal it into the frame grooves.
The full cure happens in still air, and rushing it to meet a deadline is how panels sag or refuse to lie flat once mounted.
I check by pressing a knuckle against the back of the canvas where paint pooled thickest.
If it feels even slightly cool compared to the unpainted edge, it is still drying. Once the canvas reads the same temperature across its width and shows no give when pressed, it is ready to cut and install.
10. Attach the Canvas Using Tuck-and-Glue or Staples
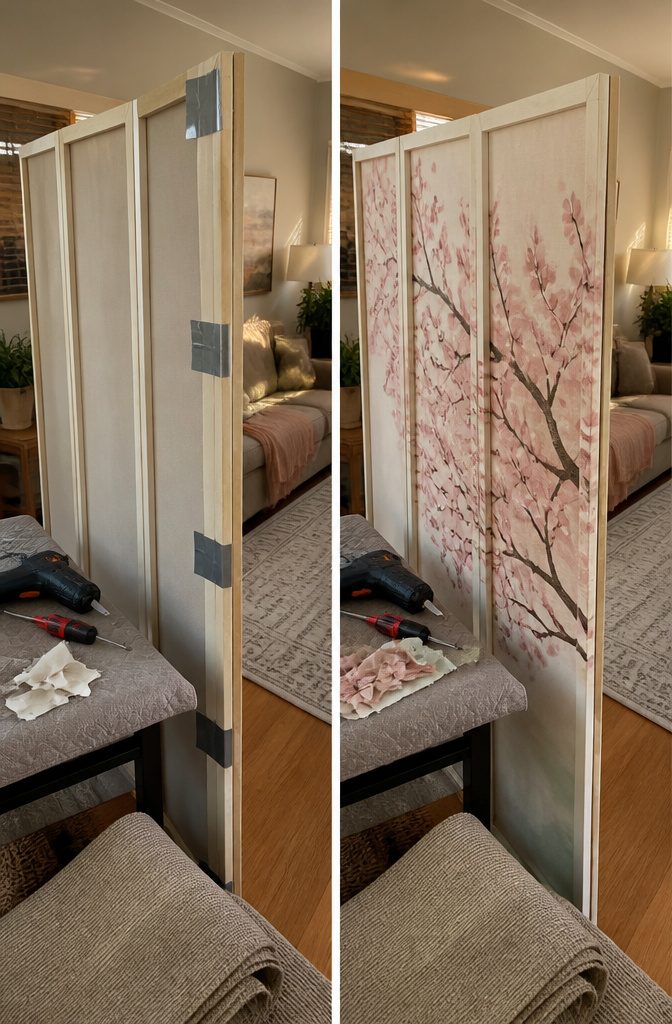
Two methods work here. The tuck-and-glue approach cuts each panel individually, then lays them face down in reverse order so the front faces the right way when you flip the divider.
Working one panel at a time, use a flat-head screwdriver to push fabric into the groove while running hot glue in short sections.
Start with the center side and top to keep the fabric from puckering, then work outward. Trim any excess to avoid bulk at the seams.
The staple method skips the cutting step up front.
Lay the whole divider face down, center the canvas over it right side down, and tack a staple at the top center of the middle panel. Pull snug and tack the bottom, then do the same on the side panels.
Work from top to bottom, checking for smoothness before you tack the sides. Once everything is stapled, cut between panels with a straight edge and cover the raw edges with colored duct tape or trim fixed with hot glue.
I would have saved time with staples.
Choosing Panel Width and Design
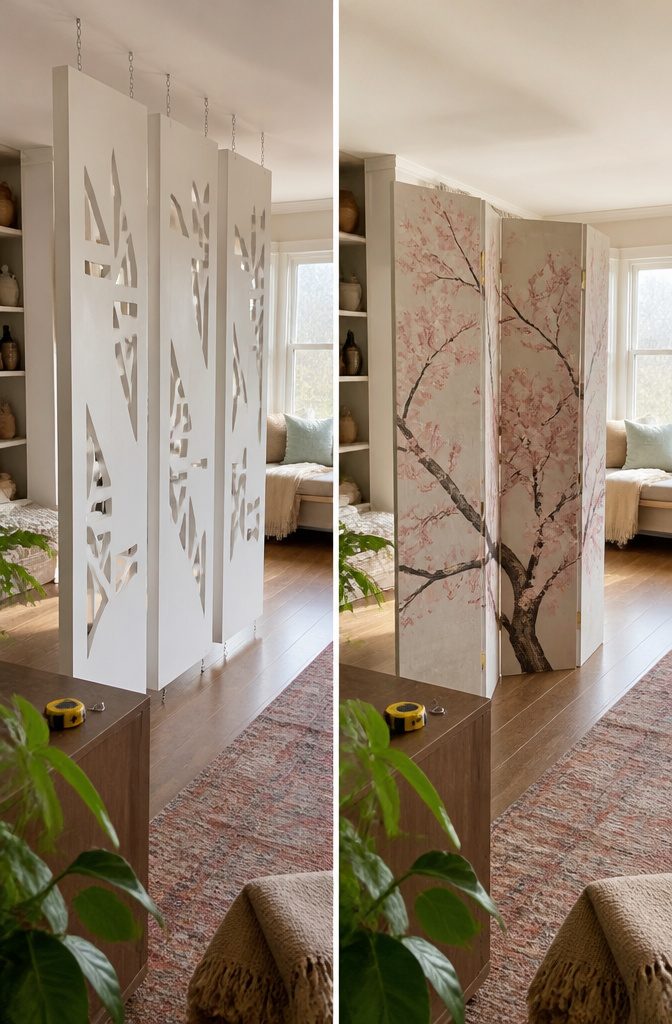
Panel width depends on the room and how much visual weight you want. The hanging divider build uses panels 12¼ inches wide and ½ inch thick, chosen for sturdiness over the thinner stock that can bow or warp when hung vertically.
Wider panels cover more ground with fewer seams, but they also get heavier and may need a third screw eye at the top for support. Narrower panels let you stagger the spacing or add a rhythm across the span.
The panels arrive painted white, and repainting them before installation is the moment to match your trim or shift to a darker tone that reads as structure rather than decoration.
The canvas divider takes a different route: a painted cherry-blossom design in loose, impressionist strokes that forgive an unsteady hand.
You can attach the finished canvas by tucking and gluing it into the frame grooves or by stapling it from behind. Stapling is faster and hides just as well, since viewers only see the front.
Support and Attachment Methods
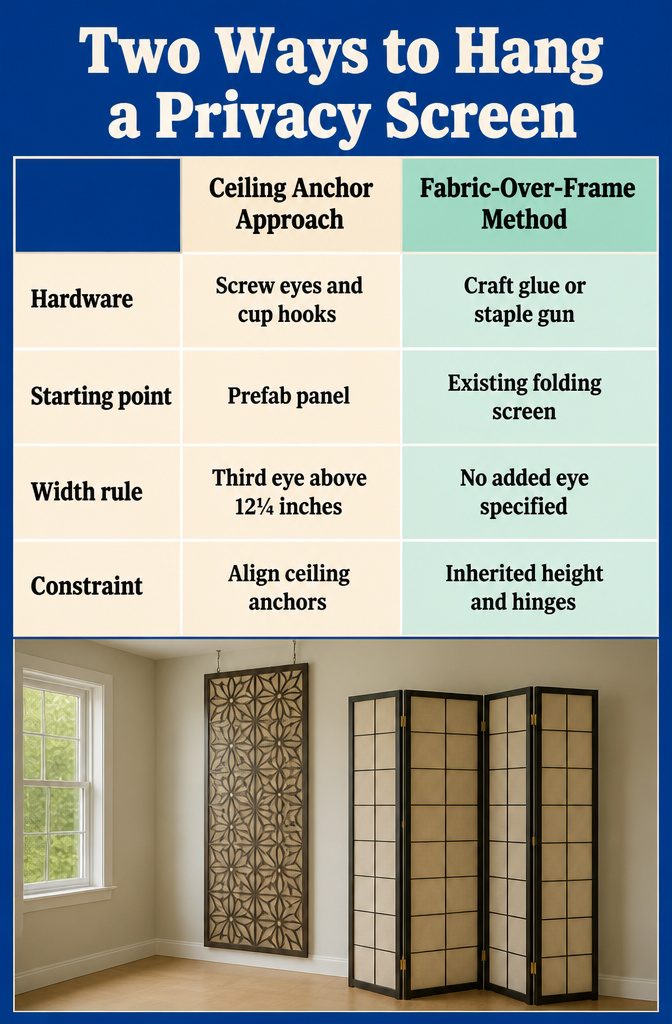
The ceiling anchor approach hangs prefab decorative panels from screw eyes placed 1 inch in from each top outer edge, with matching drywall anchors and 1-inch cup hooks screwed into the ceiling.
The screw eyes hook directly onto the ceiling-mounted hardware, so the panels hang like framed art but sized floor to near-ceiling.
If you go wider than 12¼ inches, add a third screw eye midway across the top edge to keep the panel from sagging.
A framing square keeps the ceiling anchors aligned with each other, which matters more than you think when you step back and see whether the panel hangs plumb.
The fabric-over-frame method starts with an existing folding screen rather than building one from scratch. You stretch fabric across the rice-paper panels that came with it, then fix the fabric in place with craft glue or a staple gun.
That route skips any frame joinery but locks you into whatever height and hinge arrangement the secondhand screen arrived with.
Common Mistakes to Watch For
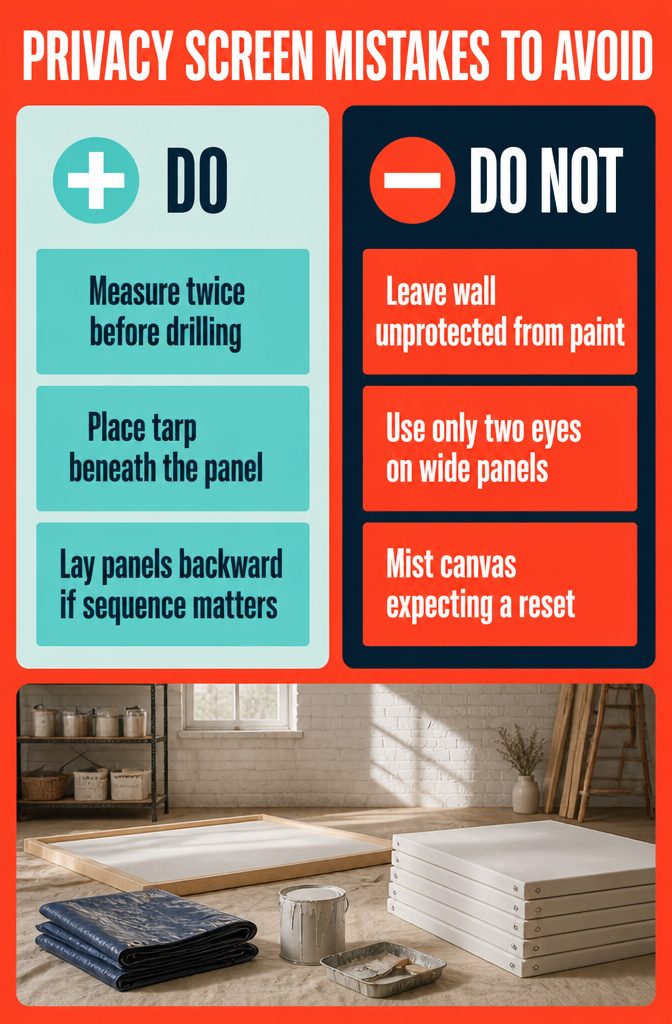
A few things go wrong often enough to be worth checking before you hang or paint:
- Paint soaks through canvas and bare walls. If you’re working against a wall, it will need three coats afterward to cover the bleed-through. Put a tarp between your work surface and the panel.
- Ceiling anchors must line up with the screw eyes you install on the panel edge, or the piece hangs crooked. Measure twice before drilling.
- Wider panels need more than two screw eyes across the top edge to prevent sagging in the middle.
- Misting is permanent. Once you’ve misted paint onto the canvas, you can’t take it back.
- Face-down panels dry in reverse order — the one you paint first ends up at the back of the stack. Lay them out backward if sequence matters.
Frequently Asked Questions
What is the best way to attach fabric to a DIY privacy screen frame?
Stapling is faster and hides just as well as the tuck-and-glue method. With staples, you lay the whole divider face down, center the canvas over it, and tack from the center outward to keep the fabric smooth.
The tuck-and-glue approach cuts each panel individually and uses a screwdriver to push fabric into the groove while running hot glue in short sections, which takes longer but works if you don’t have a staple gun.
How wide should panels be for a hanging room divider?
Panels 12¼ inches wide and ½ inch thick work well for most rooms.
Wider panels cover more ground with fewer seams but get heavier and may need a 3rd screw eye at the top for support. Narrower panels let you stagger the spacing or create rhythm across the span.
How far apart should ceiling anchors be for a hanging privacy screen?
Place ceiling anchors the same distance apart as the screw eyes on the panel’s top edge, which are usually 1 inch in from each outer edge.
If the anchors drift even half an inch out of alignment, the tilt shows immediately when the panel hangs.
How tall should a room divider panel be for 8-foot ceilings?
Panels should sit 1½–2 inches shorter than ceiling height to leave clearance for the hardware and keep the bottom edge from dragging. With 8-foot ceilings, that puts panels at 94⅛ inches tall.
Do I need to paint decorative panels before assembling a privacy screen?
Yes, painting before assembly gives the best finish since you can reach every corner of the pattern without working around hardware or taping off adjacent panels.
Spray paint covers detailed cutouts more evenly than a brush, and 2 coats usually do it with about 30 minutes per panel for drying time.
How do you hang panels from the ceiling for a room divider?
Install 2 screw eyes on the top edge of each panel, 1 inch in from each outer edge, then screw matching drywall anchors and 1-inch cup hooks into the ceiling at the same spacing.
Line up the screw eyes with the cup hooks and lift each panel onto its hooks. The panel hangs by gravity alone and can be lifted off the same way when you need to move it.
How long does canvas need to dry after painting a privacy screen design?
Leave the painted canvas hanging overnight wherever it is.
Paint feels dry to the touch long before the canvas underneath has released its moisture, and pulling it down too early leaves you with damp fabric that wrinkles when you fold it or develops mildew if you seal it into the frame grooves.