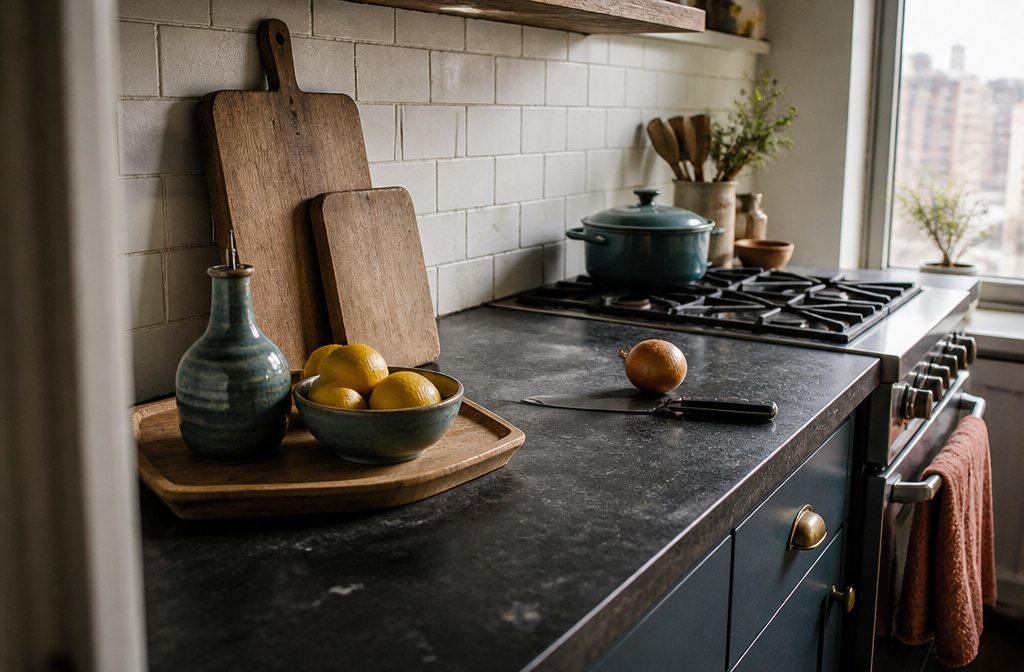
Kitchen counters can hold styled pieces that earn their spot or clutter that just landed there and stayed.
The difference comes down to grouping what you use on trays, leaning boards vertically instead of stacking them flat, and leaving at least 18 to 24 inches of clear counter space near the stove so you still have room to dice an onion or rest a hot pan.
1. Clear the Counters First
Clear the Counters First
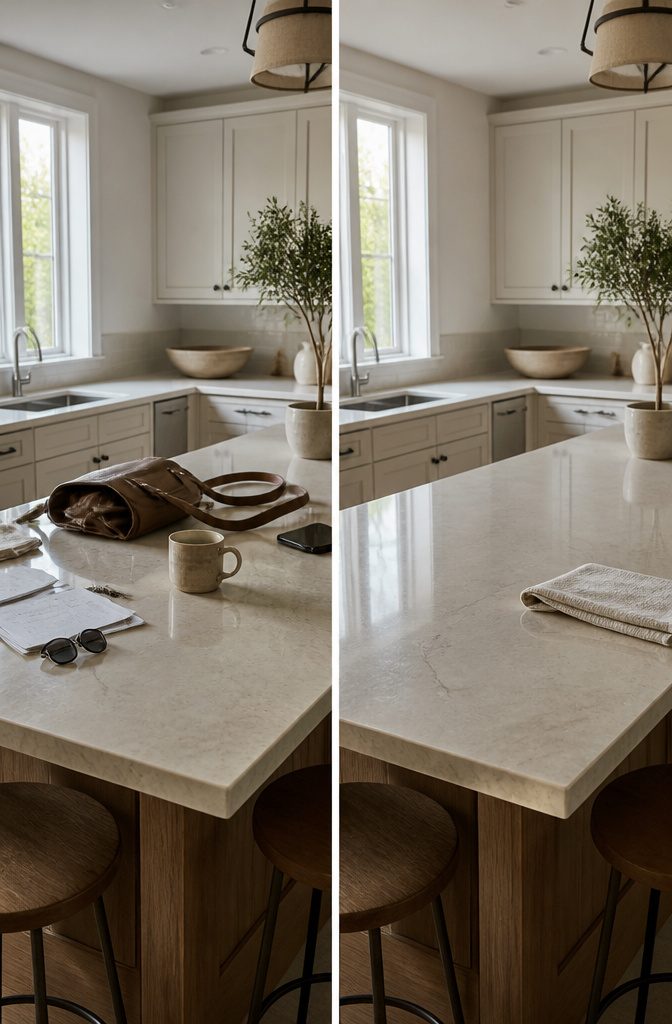
The first move is removing everything that does not earn its spot back. Mail, keys, small appliances used once a month, whatever lands there and stays—take it all off and give the surface a proper wipe down.
This gives you a clean foundation and a clear look at what the space actually holds.
I find it easier to spot what does not belong when I step back.
A photo helps even more. Snap one before you clear anything, and the clutter jumps out in a way it never does when you are standing right in front of it.
Once the counters are bare, decide what genuinely belongs in the kitchen and what can live somewhere else.
A bowl by the front door for keys and sunglasses, a basket or bin for mail near the entryway—those small moves free up real estate where you cook.
Without the daily pile-up taking over, the counters feel calmer and you have room to bring in the pieces that actually make the space look finished.
2. Group Small Objects on Trays or Boards
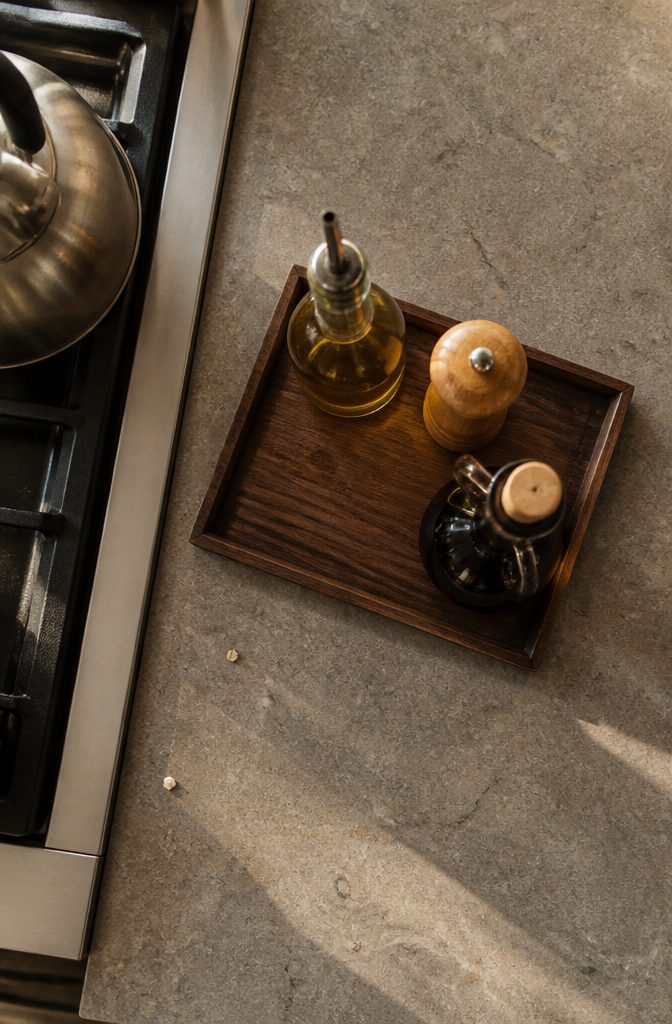
Trays and boards pull small objects into contained zones instead of leaving them scattered across the counter.
Group essentials on one or two serving boards — oil, salt, pepper, spices by the stove, or soap and a sponge by the sink — and the counter reads as styled rather than cluttered.
A tray with handles makes it easier to lift the whole grouping when wiping underneath.
A small tray—rectangular or round—can neatly hold a bottle of olive oil, a salt grinder, and perhaps a special vinegar or condiment, while also protecting the countertop from any oil rings or drips.
That protection matters as much as the styling. The tray catches drips and keeps oil from marking the counter, and on an island, a larger tray holds flowers, glassware, or a stack of plates ready for serving.
Three items on a tray feel deliberate; the same three spread out look like clutter waiting to be dealt with.
3. Keep Useful Items Out, but Make Them Attractive

Everyday items can stay on the counter if they look good doing it.
Decant dish soap into a glass bottle, store flour and coffee in matching canisters, and choose a toaster or coffee maker that blends with your backsplash. A white breadbox with a wooden lid holds the loaf and reads as decor.
Near the stove, glass canisters lined up in a row hold flour, beans, and mugs; the matching shapes turn pantry staples into a display rather than clutter.
Even the sponge matters. Swap bright synthetic ones for white or natural versions, and the sink area looks cleaner before you wipe it down.
Target stocks glass dispensers for dish soap; Crate & Barrel carries toasters that earn their spot on the counter. Keep what you reach for multiple times a day and make every piece something you like to look at.
4. Add Greenery or Fresh Flowers

A small potted herb or a vase of fresh flowers instantly softens the counter and adds life to the space.
Basil, mint, and rosemary all work well near the sink, where you can snip them while you cook. Grouping two or three small pots together reads as one intentional spot rather than a scattering of plants across the surface.
Fresh branches, seasonal stems, or even a bowl of lemons bring the same natural warmth to a different part of the counter. If your kitchen gets good light, real plants and cut flowers are worth the effort.
If it doesn’t, or if you don’t have a green thumb, faux greenery has improved enough that it delivers the same softening effect without the upkeep.
I lean on realistic faux stems more often than fresh ones, and they hold up well in a kitchen that doesn’t get much sun.
5. Display Fruit in a Bowl

Seasonal produce in a bowl adds color and gives you something ready to eat. I keep apples and bananas out where everyone can grab them, and the changing variety keeps the counter from looking static.
Pomegranates at Christmas, artichokes in spring, peaches or plums in summer — the rotation brings different color palettes through the year without buying anything that sits on display permanently.
The bowl itself matters as much as what goes in it. Antique wood reads warm, colored ceramic adds another layer of pattern, and marble keeps the look cooler and more minimal.
All three work; the choice comes down to whether your counters need more texture or more restraint. Either way, fruit that actually gets eaten stays fresh-looking, which is half the point of putting it out in the first place.
6. Lean Cutting Boards Against the Backsplash
Lean Cutting Boards Against the Backsplash
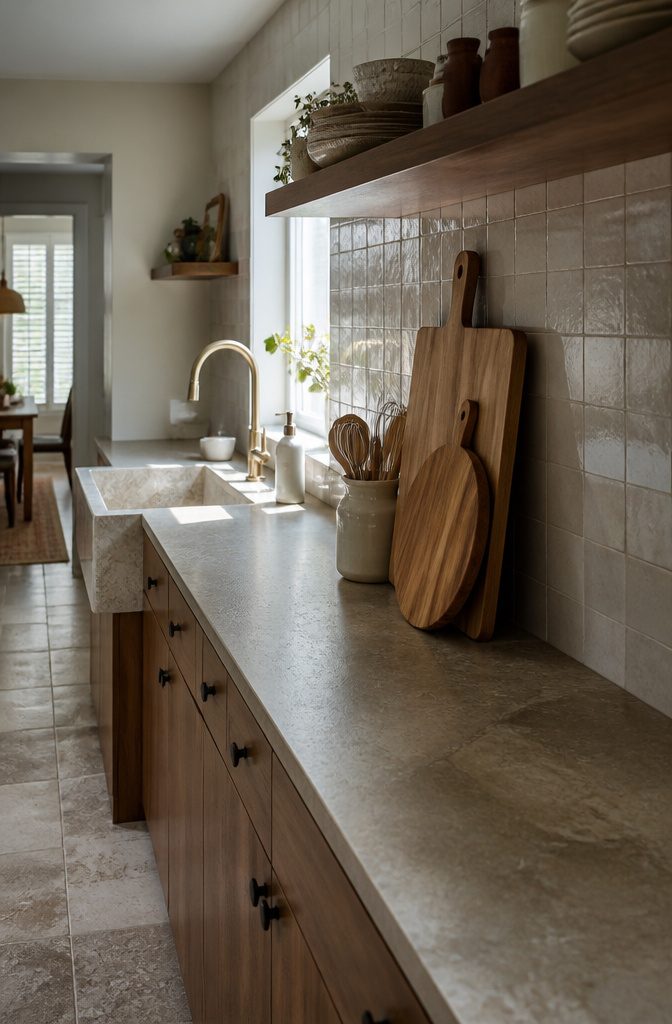
Serving boards propped vertically add warmth and texture without eating into counter space. Wood tones layer well against tile or stone backsplashes, and a tall board can hide an awkwardly placed outlet in the center of the wall.
Two boards at different heights work as an easy starting point, though a single large board or three varied shapes can look just as good when you mix orientations or materials.
These are display boards, not your everyday cutting surface.
Keep the hardworking ones in a drawer and let the prettier vintage or thick wood pieces earn their spot on the counter. When they lean instead of lying flat, they fill vertical space and take up almost nothing front-to-back.
The look is simple enough to set up in minutes, and functional enough that you can still grab one when you need a serving tray for cheese or bread.
7. Add a Small Lamp for Ambient Light

A lamp adds warmth after dark and makes the kitchen feel lived-in rather than purely functional.
The small glow changes the mood once dinner is done, giving the space a calming evening vibe that overhead lights never quite manage. I’ve always liked the idea of a lamp somewhere in the kitchen for exactly this reason.
This works best on counters away from the main work zone, where a lamp won’t compete with your task lighting or get in the way while you’re cooking.
A corner by the sink or a stretch of counter near the fridge both hold a lamp well.
Look for one that fits under your cabinets without crowding the space, and choose a soft, warm bulb so the light does its quiet work without feeling harsh.
A smart plug lets the lamp come on at dusk automatically, so you never have to think about it. If an outlet isn’t nearby, a battery-operated bulb delivers the same warmth without cords to hide.
8. Lean Art or a Frame Against the Backsplash
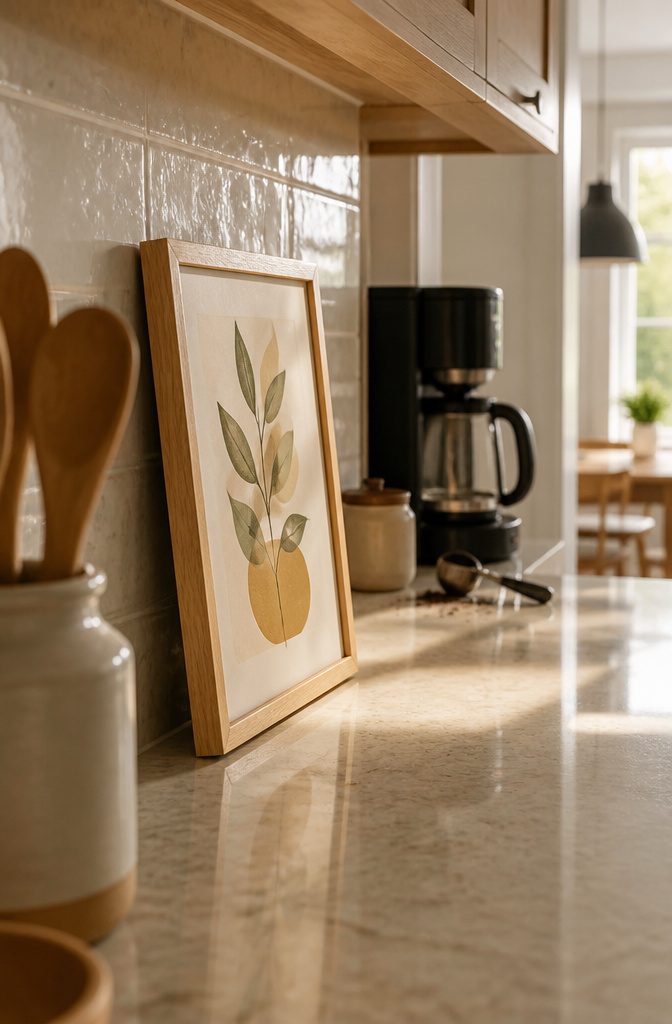
Lean Art or a Frame Against the Backsplash
Framed prints or small art pieces bring personality to the counter without claiming any surface you actually need for prep.
Lean them against the backsplash rather than hanging them, and you keep the setup flexible. You can swap in new prints, rotate seasonal pieces, or move the frame to a different spot without patching nail holes or measuring twice.
Botanicals, pears, animals, and other nature prints all sit comfortably in a kitchen. A small frame propped behind the coffee maker or next to a utensil crock breaks up the horizontal line that flat counters and a backsplash create together.
That vertical element adds visual interest in a space that otherwise runs flat from end to end. The frame itself takes up an inch or two of depth at most, so you lose almost nothing to the wall.
9. Display Cookbooks or Use a Cookbook Stand

Cookbooks sit somewhere between decoration and tool, and that double duty makes them perfect for counters that need to look like something without giving up function.
A stack of three or four favorite books near the stove adds height and a personal note, especially if the spines have color or worn edges that make them look used rather than staged.
Prop one open on a stand and it becomes a working part of the kitchen instead of just something to look at.
The angle of the stand keeps the pages visible while you cook, and a good one holds the book flat so you’re not wrestling with it mid-recipe.
Wood stands read warmer than metal, but either works depending on what else sits on the counter. Books wear well in kitchens as long as they’re not parked directly next to the sink or a splatter zone.
10. Vary Height and Layer Materials

Flat surfaces read as boring, so mixing heights and textures solves two problems at once.
A grouping built from a tall object, something grounded, and a sculptural piece creates dimension without real clutter. The tall item pulls the eye up, the grounded piece anchors the composition, and the sculptural element adds personality between them.
Layering materials matters just as much. Wood, marble, and metal together feel collected rather than matched.
A wooden cutting board leans against smooth ceramic canisters, or a woven tray sits under a stack of glossy dishes. Rough next to refined keeps the counter from falling flat, especially in kitchens that lean neutral or monochromatic.
Three-tier stands follow a similar logic: taller items on top, medium pieces in the middle, and larger functional items below.
That arrangement keeps weight at the bottom and gives each piece room to register without competing. The order matters more than the objects themselves.
11. Refresh One or Two Spots Seasonally

Switching out a bowl of pumpkins in fall for fresh flowers in spring keeps the counter feeling current without redoing the whole layout.
I focus the change on one or two spots rather than every surface. A single vase on a coffee station or a larger arrangement on the island is enough to mark the season.
In winter, a bowl of pinecones might replace the summer herb pot. In fall, I swap the everyday knife crock for a basket of dried grasses with a small glass candle on a wooden board beside it.
Even a pumpkin-shaped Dutch oven on the stovetop brings seasonal charm to a spot that is usually all function. The shift takes minutes, and the counter stays workable the rest of the year.
12. Create a Coffee or Beverage Station

A coffee station keeps all your morning essentials in one place instead of scattered across three cabinets.
Set it up right next to the coffee maker on a tray or in a basket: a canister for beans or pods, mugs within reach, and a small vase or candle to make the spot feel less purely functional.
I keep mine at the end of the counter, away from the sink and stove, so it can afford to be a little more styled.
The best part is how contained it stays. Cabinet above for cups, drawer below for stirrers and napkins, everything else on the tray itself.
A three-tiered stand works particularly well here if you need the vertical space—one level for mugs, another for coffee and sweetener, a third for a plant or folded towels.
Corners handle this setup just as neatly as open counter runs, and either way the grouping reads as intentional rather than creeping across the surface one item at a time.
13. Match Decor to Your Counter Surface
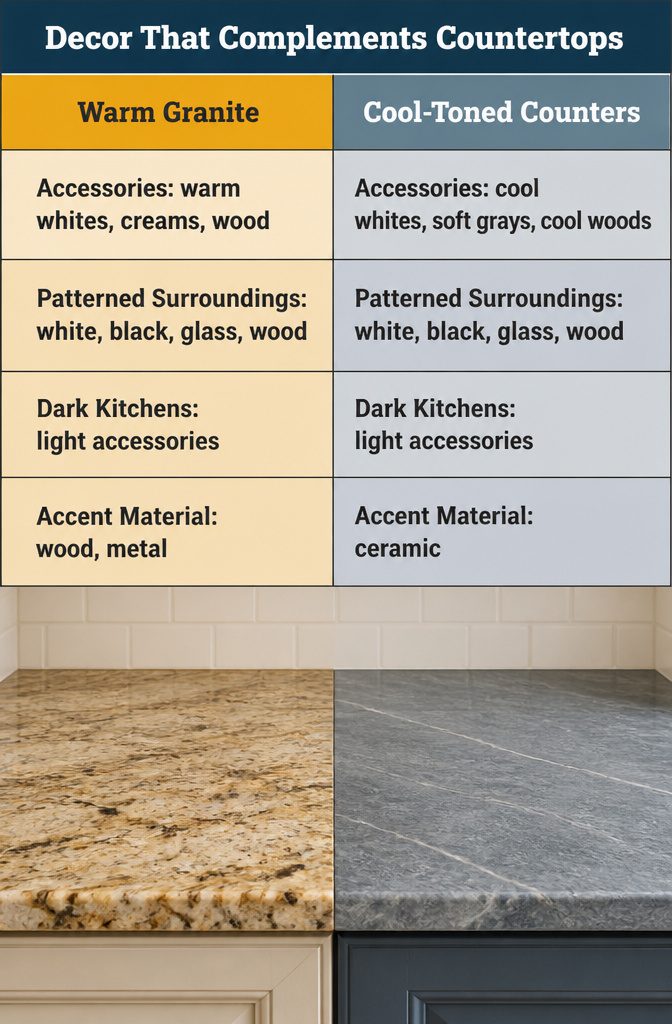
Your counter surface already brings color and pattern to the space, and the decor sitting on it needs to work with that rather than fight it.
Granite with gold, tan, or brown undertones pairs best with warm whites, creams, and natural wood accents.
Gray, black, or blue-toned surfaces look more cohesive with cool whites, soft grays, and cooler-toned woods. The logic is simple: warm surfaces want warm accessories, cool surfaces want cool ones.
Busy counters or patterned backsplashes need simplicity.
I stick to white, black, glass, or wood so the eye has somewhere to rest instead of scanning across competing patterns. Dark kitchens feel lighter with white or light-colored accessories breaking up the heavy finishes.
Your countertop material—quartz, marble, granite, or laminate—should guide what you put on it.
Wood or metal accents warm up cool-toned counters; ceramic pairs well with warmer tones. You want contrast that complements rather than pieces that disappear into the surface.
14. Use Zones for Different Activities

Thinking through your counter in separate zones rather than as one long surface keeps both the function and the look intact.
The areas where you actually prep food stay clear, and the spots that face the room or catch the eye first can hold a more styled arrangement without getting in the way.
A solid island calls for one focal arrangement instead of items scattered across the surface. A large tray or low basket anchors the setup and holds a vase, a stack of cookbooks, and a decorative bowl without spreading out.
When you need the full counter, the whole arrangement lifts off in one move. An island divided by a sink or cooktop needs different treatment on each side.
The prep side gets minimal decor, maybe a small tray with a candle and a plant, so workspace stays open. The seating or serving side can carry a bigger centerpiece or a low seasonal tray since that section leans decorative.
15. Add Candles for Warmth

A candle on the counter brings two things you can see in the room within seconds: a warm glow that softens the hard edge of stainless appliances, and a scent that walks over whatever fish or garlic you cooked an hour ago.
I keep a candle on a small wooden pedestal near the sink, out of the direct heat zone but close enough that the scent carries when I light it in the evening. The height matters more than you would expect.
A pedestal lifts the candle off the flat plane and gives you that layered look without adding clutter, and stacking a few inches keeps the flame away from anything that could drip or splash.
For the kitchen specifically, foodie scents hold up better than floral ones.
Sweet lemon, grapefruit, country pear and fresh-roasted coffee all smell right in the space. A candle warmer works if open flame near dish towels makes you nervous, and it still adds that sculptural presence on the counter.
Just keep candles and warmers a full arm’s length from the stove, where spattering oil or a lifted pot could knock them over.
Leave Room for Actual Work

Style in a way that doesn’t get in the way. If you cook often, leave at least 18 to 24 inches of clear counter space near your stove or sink.
I’ve found that this buffer makes the difference between a countertop that looks good and one that actually works when you need to dice an onion or rest a hot pan.
Think in zones. Some spots will always be work zones, where you prep food and need every inch clear.
Others can hold useful items arranged attractively, and a few may be purely decorative. Walking through your kitchen with that division in mind takes the overwhelm out of deciding what stays and what goes.
For an island with a sink or cooktop, style each side according to how you use it. The prep side stays minimal so you don’t lose workspace.
The seating or serving side can hold a larger arrangement. Balancing beauty and function means preserving space for the tasks you do most, not filling every surface just because it’s there.
Limit the Number of Vignettes
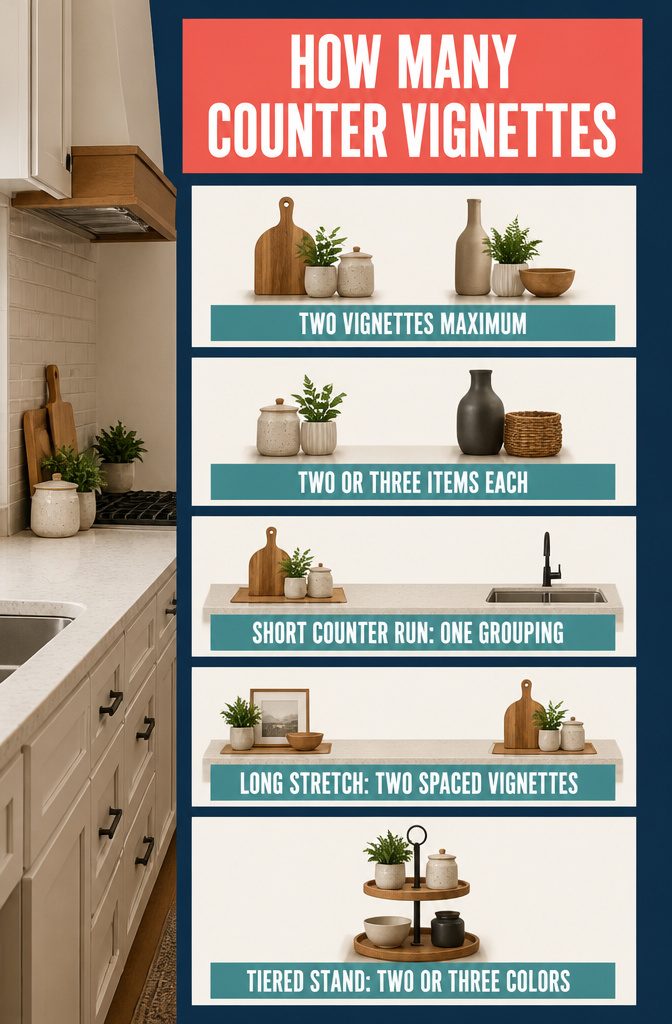
I group no more than two vignettes on each stretch of counter, and each one holds just two or three items.
More than that and the line between styled and crowded disappears fast. The rule of three works — a cutting board, a small plant, and a ceramic jar makes one grouping — but odd numbers are a guideline, not a law.
Two objects can anchor a vignette just as well if they differ in height or material.
Counter length decides how much you can put down. A short run between the stove and the sink might hold one small grouping and nothing else.
A longer stretch near the far wall can take two vignettes spaced wide enough that each reads separately instead of bleeding into a single cluttered row.
Restraint is the thing that keeps this from looking like a shelf at a home goods store.
If I use a tiered stand, I limit it to two or three colors total. More than that and the eye has nowhere to land.
Frequently Asked Questions
How do I decorate my kitchen countertops seasonally?
Swap out 1 or 2 focused spots rather than changing the whole counter.
Replace summer herbs with fall pumpkins, then winter pinecones or greenery, then spring flowers. A single vase or bowl refresh is enough to mark the season without redoing your entire setup.
What should you never leave on kitchen countertops?
Clear off appliances you use less than once a month, mail, keys, and anything that lands there out of habit rather than need.
Dirty dishes belong in the sink or dishwasher immediately, and cleaning supplies should live under the sink or in a nearby cabinet instead of taking up prep space.
How do I choose kitchen counter decor that’s both stylish and useful?
Keep the items you reach for daily but make them look good doing it.
Decant dish soap into glass bottles, store coffee and flour in matching canisters, and pick a toaster or coffee maker that suits your backsplash. Everything that stays out should earn its spot through function and appearance both.
What colors work best for modern kitchen counters?
Match your counter’s undertone first. Granite with gold, tan, or brown pairs with warm whites, creams, and natural wood; gray, black, or blue-toned surfaces want cool whites, soft grays, and cooler woods.
Busy counters need simple accessories in white, black, glass, or wood so the eye has somewhere to rest.
Can I mix materials on my kitchen countertops?
Yes, mixing wood, marble, and metal keeps the counter from falling flat. Rough next to refined works better than matched sets, especially in neutral or monochromatic kitchens.
A wooden cutting board against smooth ceramic canisters or a woven tray under glossy dishes creates the contrast that makes a grouping feel collected rather than staged.
What are some good decorations for kitchen countertops?
Start with grouped essentials on trays, a bowl of seasonal fruit, and cutting boards leaned against the backsplash.
Add a small plant or fresh flowers near the sink, a framed print propped behind the coffee maker, and a candle on a pedestal for evening warmth.
The best decor sits somewhere between useful and beautiful, not purely one or the other.
What not to put on kitchen counters?
Skip appliances you rarely use, cleaning supplies, mail, and anything that crowds the spots where you actually prep food.
Leave at least 18 to 24 inches of clear space near the stove or sink so you have room to work when you need it.
If it does not get used multiple times a day or add something to the look, it belongs in a cabinet or drawer instead.
How can I update my kitchen countertops without replacing them?
Change what sits on them rather than the surface itself. Group small items on trays, add greenery or a bowl of fruit, and lean wood boards against the backsplash for texture.
A small lamp or propped frame brings personality, and swapping 1 or 2 spots seasonally keeps the counter feeling current without a full redesign.