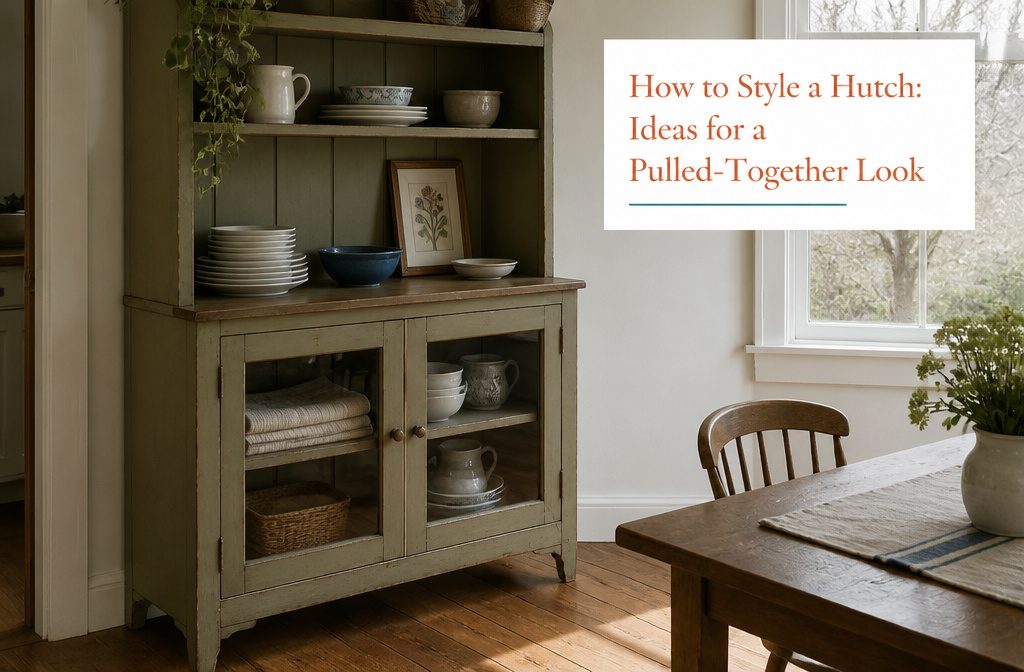
A hutch styled well holds dishes you use, collections you care about, and enough breathing room to see both.
Getting there takes an afternoon and whatever you already own, but most people either pack every shelf or leave half of it empty because they can’t tell when to stop.
The answer changes depending on whether the hutch sits behind glass doors or on open shelves, and whether you’re working with a narrow corner piece or a full-width cabinet with plate grooves already built in.
1. Choose a Theme or Story
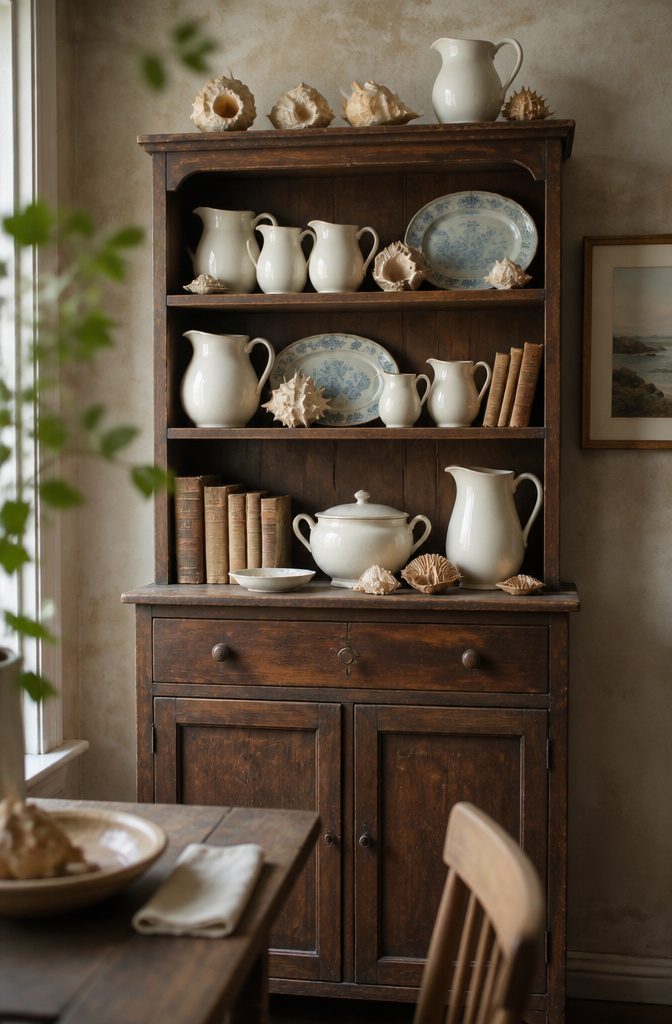
The direction you choose depends on what you already own and which room the hutch lives in. If the hutch sits in a dining room full of vintage pieces, a theme built around antique dishes and nostalgic touches makes sense.
A modern space calls for something different: monochromatic dishes, clean lines, maybe a few geometric accents. Carry that choice all the way through, from the top shelf down.
Seasonal changes offer another route.
Instead of locking into one look year-round, let the hutch reflect winter, spring, summer or fall as the months shift. That rotation keeps the display from going stale and gives you a reason to pull out different pieces you’ve collected.
Personal collections tell a stronger story than random decor. Shells gathered over years, ironstone pitchers, old books—mixing those together feels like a naturalist’s cabinet rather than storage.
Make sure the theme fits the house. Shells work better when they sit alongside other coastal objects than when they dominate a hutch that isn’t near the coast.
Color schemes help narrow the field when you’re deciding what stays and what doesn’t. Picking a palette—pink and green with white, or red, white and blue for a patriotic angle—gives you clear criteria.
A tighter edit prevents the hutch from reading as cluttered, which happens fast when both function and display compete for the same shelves.
2. Arrange for Visual Balance with Height, Shape, and Layers
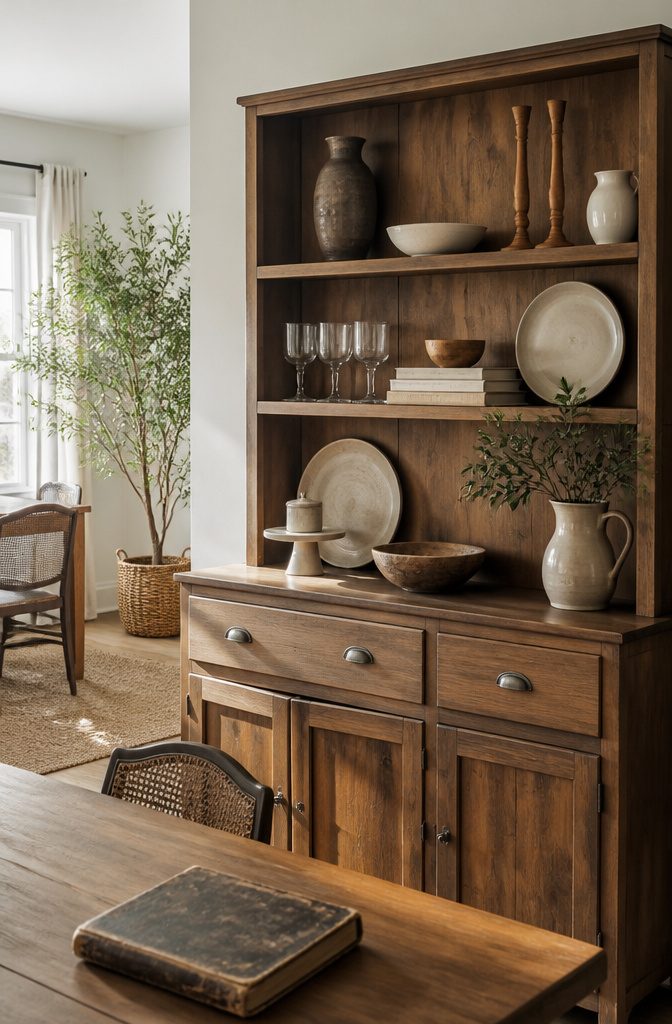
Start with the larger or taller pieces and place them first—vases, candlesticks, urns—so the visual weight settles before you layer in anything smaller.
Once those anchor pieces feel balanced, the smaller objects know where they belong. Plates, small sculptures, and picture frames slot in around them, and you can edit out anything making the grouping look too repetitive.
Vary the forms while you work. All rounded shapes side by side flatten out fast, so break up plates with the vertical lines of glass goblets or the angular edges of stacked books.
Cake stands are a favorite for lifting smaller collectibles into view and adding vintage charm—they work on open shelves or stacked on top of the hutch for dimension.
Books do the same job on lower shelves, especially behind glass doors where a small piece would otherwise sit too low to see.
Layer front to back.
Tall pieces go at the back, medium items in the middle, short ones forward. That depth keeps the arrangement from reading flat and gives each piece breathing room.
3. Display and Group Dishes or Collections

Stand plates up, stack bowls by size, or group your china by color or pattern to create a display that shows off your collection without losing the storage function.
If your hutch has built-in plate grooves, you can set plates directly in them. If not, a simple stand or easel holds them upright.
When stands take up too much shelf depth, I ball up a bit of tacky putty and press it onto the rim of the plate to hold it steady and keep it from sliding.
Stacking dishes adds height and texture. Stack bowls and smaller pieces to fill vertical space and create layers that draw the eye through the hutch.
Grouping by color gives you a clean, cohesive look, while grouping by pattern brings more visual interest and works well if you lean toward an eclectic style.
Either method makes it easier to find a specific piece when you need it and keeps the overall arrangement feeling intentional rather than random.
4. Coordinate Color and Use Contrast Thoughtfully

A palette ties together patterns and materials that might otherwise clash. I work with two or three main colors, then add white or a neutral to let the eye rest.
One hutch I studied used pink and green as its main colors, with white and hints of blue—the pink showed up in florals, the green in transferware, and the white gave breathing room between them.
Another leaned patriotic with red, white, and blue carried from top shelf to bottom.
Color blocking is the other route, especially in modern spaces. Instead of blending shades across every shelf, you assign each section its own color zone: all cream dishes on one shelf, navy bowls on another.
The hard edges read contemporary, and you skip the work of finding pieces that share a palette.
Whichever approach you take, paint or line the back panel if you want the display to feel more deliberate.
A painted back draws the eye in and makes collections pop against a defined field rather than fading into the wall behind them.
5. Add Personal, Sentimental, or Unexpected Objects

Family keepsakes, travel souvenirs, and meaningful objects give a hutch the personality a purely decorative arrangement lacks.
Framed photographs in simple frames, figurines tied to a hobby, vintage cameras, or small heirlooms all work when they matter to you rather than fitting a neutral theme.
A shelf that holds only one kind of thing reads more like storage than a display worth looking at.
I think mixing categories solves that. Ironstone pitchers grouped with shells and old books feels less like beach-house kitsch and more like a naturalist collection, the kind someone assembled over years because each piece earned its place.
The same logic applies to restaurant china kept from a family business, vintage flower pots collected one at a time, or souvenirs that survived the move home.
The unifying thread is that you chose to keep them, not that they match.
Books, recipe boxes, and decorative boxes add weight and break up rows of smaller objects.
Shadow boxes work for flat mementos that would otherwise sit in a drawer. Vary the height and group similar items rather than scattering them evenly across every shelf, and the whole arrangement holds together without looking arranged.
6. Use Greenery, Flowers, or Seasonal Details

Plants bring color and movement to a hutch without adding clutter.
Trailing varieties like ivy or pothos drape over the edge of a shelf and soften the lines of the piece, which works especially well if the hutch itself reads as boxy or formal.
Small potted succulents fill gaps between larger items, and a vase of fresh flowers on a middle shelf adds a bright focal point that changes week to week.
Faux greenery holds up when maintenance is a concern. High-quality faux stems look convincing from a few feet away and let you keep the display consistent year-round.
Seasonal details let you refresh the look without reworking the entire arrangement.
Spring and summer call for fresh blooms and pastel accents. Fall brings pumpkins, dried leaves, and warm tones like orange and gold.
Winter leans into holiday decor, pinecones, and deeper colors such as burgundy and emerald. Swapping a few pieces each season keeps the hutch from feeling static.
7. Add a Backdrop or Accents
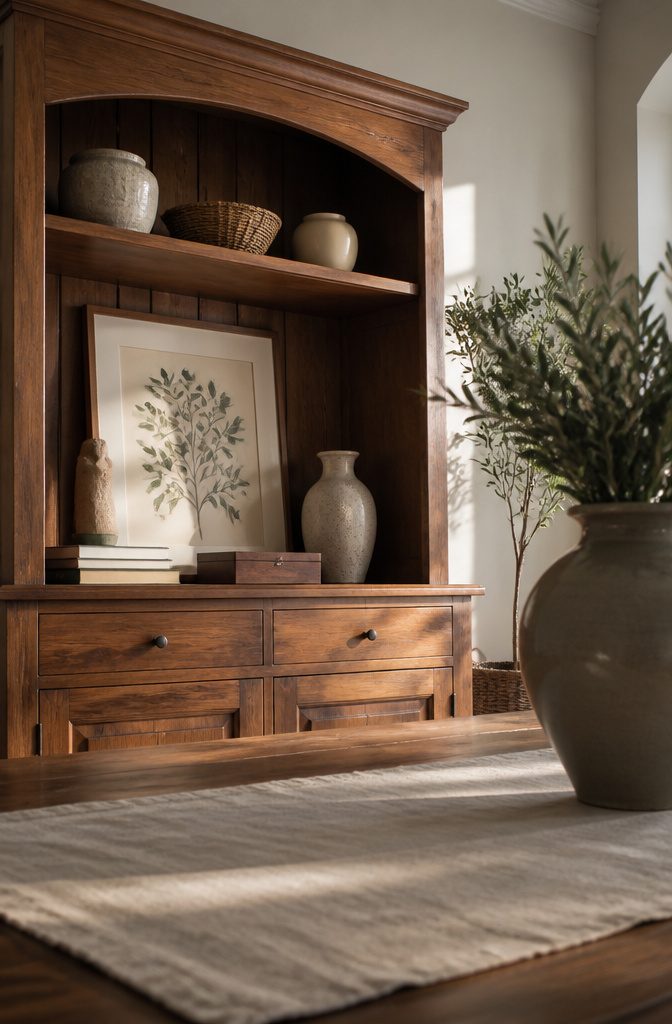
A mirror, textile backdrop, or piece of framed art can turn the hutch’s back panel into a focal point rather than leaving it to fade.
If the existing back feels plain, you can change it with paint, contact paper, fabric or wallpaper. One approach is to cut cardboard to fit the back of the cabinet, cover it with leftover contact paper, then prop it inside.
The cardboard lifts out if you want to swap patterns, and the contact paper peels off without damage.
Decorative objects layered in front add texture and personality. Framed prints or photographs can lean against the back wall.
Small sculptures, figurines or decorative boxes fill gaps and give the eye somewhere to land between larger pieces. Fresh flowers, books and recipe boxes work the same way when the arrangement needs something unexpected.
8. Edit the Arrangement and Stop When It Feels Right

Move pieces around until the display looks balanced, then stop before you add too much.
The right amount of stuff depends entirely on what you’re working with and how full or spare a look you prefer. Some shelves hold their weight packed with objects, while others say more when half the space stays empty.
I find that pitchers and platters can fill a shelf quickly without it feeling crowded, but smaller pieces need more breathing room or they blur together.
If a shelf starts looking busy, pull a few things out and see whether you miss them.
You probably won’t. Narrowing to a theme or a color range makes it easier to know when to quit, because the pieces that don’t fit announce themselves.
The arrangement can change with the seasons if you want it to, and probably should. What looks right in January might feel wrong by June, and swapping a few pieces out keeps the hutch from becoming wallpaper you stop noticing.
Refresh the Hutch with a Clean Slate
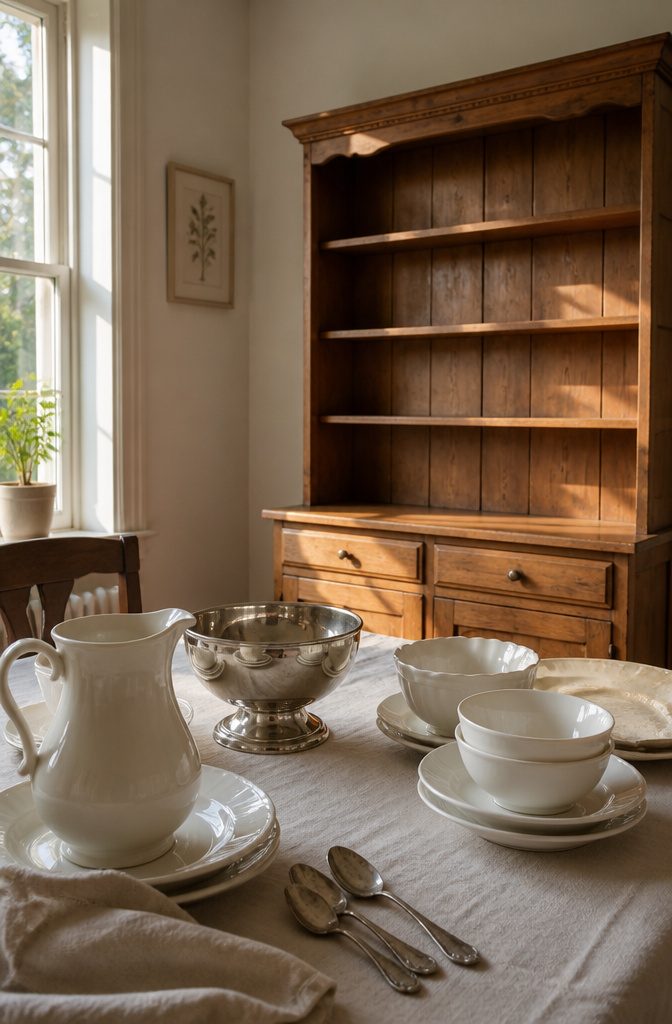
Clear everything off the shelves before you start.
I pulled every pitcher, plate, and decorative piece from my hutch to give myself a blank canvas, and that empty space made it easier to see what the shelves needed rather than what I was simply storing.
Wipe down each shelf while you’re at it—dust settles fast on open shelving, and starting with clean surfaces makes the whole arrangement feel more intentional.
Gathering decor from other rooms helps too. I walked through the house collecting white pieces and anything silver that might work, then spread them out on the table to see what I had.
The empty hutch can feel a little intimidating at first, but it’s also exciting. You’re not committing to anything permanent.
Try something, shift it, move a piece to the next shelf, and adjust until it feels right. It’s finished when you’re happy with it or when it’s time to make dinner, whichever comes first.
Adapt Styling to the Hutch’s Construction

The hutch itself tells you what works. A few construction details shape how you arrange things, and working with them rather than around them keeps the display stable and visible.
- Glass doors determine what stays in view when closed. I stack books on lower shelves to lift smaller pieces into the sightline, so vintage bowls or teacups don’t disappear behind the frame.
- Corner hutches need a corner, and window placement sometimes limits where that corner can be. Plan the room layout before you commit to a corner piece.
- Narrow or triangular shelves — common in corner hutches — restrict how much depth you have to layer. Plates work well here because they stand upright. If the hutch has plate grooves, use them. If not, a small easel or a ball of tacky putty pressed to the rim holds the plate secure without taking up space a stand would claim.
Frequently Asked Questions
How do you display plates in a hutch?
Stand plates upright using built-in grooves if your hutch has them, or use a simple stand or easel if it doesn’t.
If stands take up too much shelf depth, press a small ball of tacky putty onto the plate rim to hold it secure without claiming extra space.
Group plates by color for a clean look or by pattern for more visual interest.
What is the best way to arrange items in a hutch?
Place your largest or tallest pieces first to anchor the visual weight, then layer in smaller objects around them.
Vary the forms by mixing rounded shapes with vertical lines and angular edges, and layer front to back with tall pieces at the back and short ones forward.
Stop adding when the display feels balanced rather than filling every inch of space.
How do you style a corner hutch?
Corner hutches need a corner in the room, and window placement can limit where that corner falls, so plan the layout before you commit.
The narrow or triangular shelves common in corner hutches restrict layering depth, so plates work especially well because they stand upright. Use plate grooves if your hutch has them, or secure plates with a small easel or tacky putty.
Should I use a color scheme when styling a hutch?
A palette of 2 or 3 main colors plus white or a neutral ties together patterns and materials that might otherwise clash and gives you clear criteria for what stays and what doesn’t.
You can blend shades across shelves for a traditional look or color block by assigning each shelf its own zone for a more contemporary feel.
A tighter edit prevents the hutch from reading as cluttered when both function and display compete for space.
How often should you change the decor in a hutch?
Seasonal swaps keep the display from feeling static and give you a reason to rotate different pieces you’ve collected.
What looks right in January might feel wrong by June, so swapping a few items each season prevents the hutch from becoming something you stop noticing.
You can also change how much you like on a shelf with the seasons, varying between fuller and sparser looks as your eye shifts.