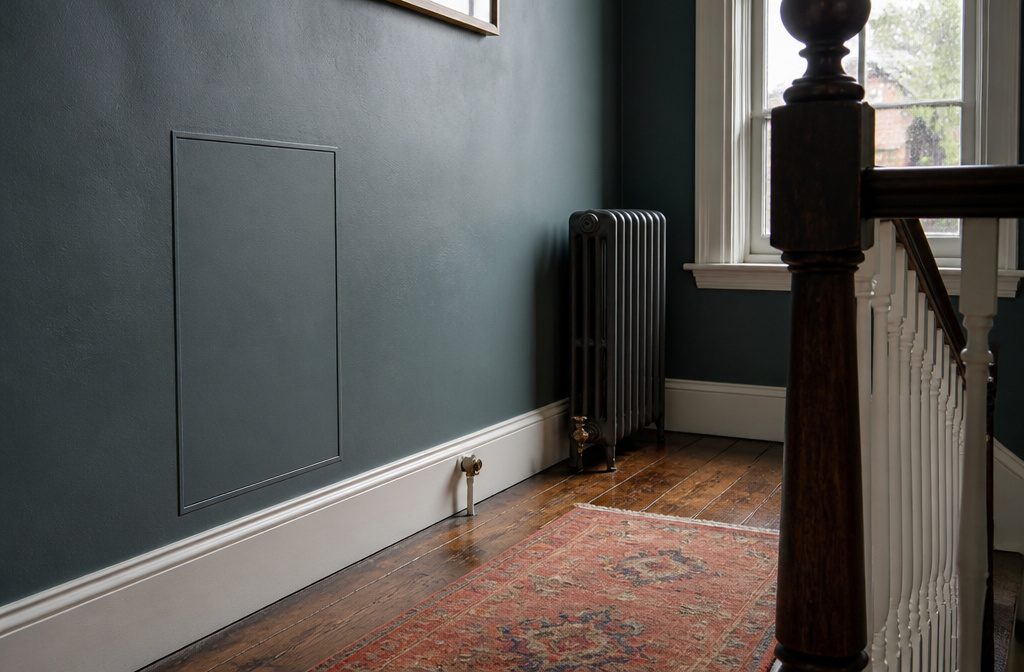
A plumbing access panel that disappears into the wall takes a framed opening, finished trim that covers the cut edges, and a door built to match the surface around it.
Most panels fail because builders skip the frame and screw drywall directly into the opening, where it crumbles after two or three removals and leaves ragged edges that won’t sit flush.
1. Choose the Panel Type and Size
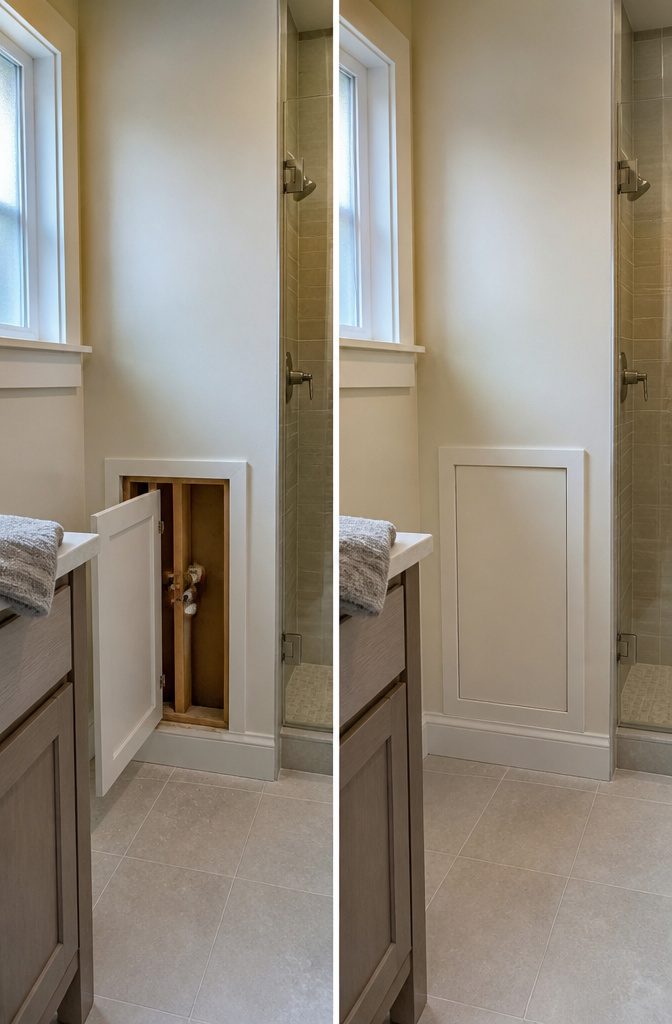
The panel needs to fit both the opening and the wall surface. A typical framing bay runs 14-1/2 inches wide, and if the valve or shutoff sits conveniently between two studs, the bay sets the width for you.
When a stud lands in the middle of your planned opening, widen the panel to the next bay or frame around it with short 2x blocking.
Size the panel to reach everything that might need service. If the valve, the shutoff, and a stub-out all sit within a foot of each other, a small hatch works.
Spread-out fittings call for a larger opening. I measure to the farthest component and add four inches for hand clearance.
Drywall alone makes a poor panel.
The material crumbles after a few removals, leaving ragged edges and loose gypsum dust. Plywood holds up better.
Sand it smooth with 120-grit or finer so paint grabs evenly. Ready-made access hatches come in standard sizes and skip the crumbling problem altogether, though they read as hatches unless you finish them to match the wall.
In a tiled shower or behind tile wainscot, a tile-integrated panel disappears entirely.
The frame sits flush with the tile surface, and you apply tile directly to the door. That option works only when the wall depth accommodates both the mechanism and the panel thickness, so check clearance before ordering.
2. Plan the Location and Opening
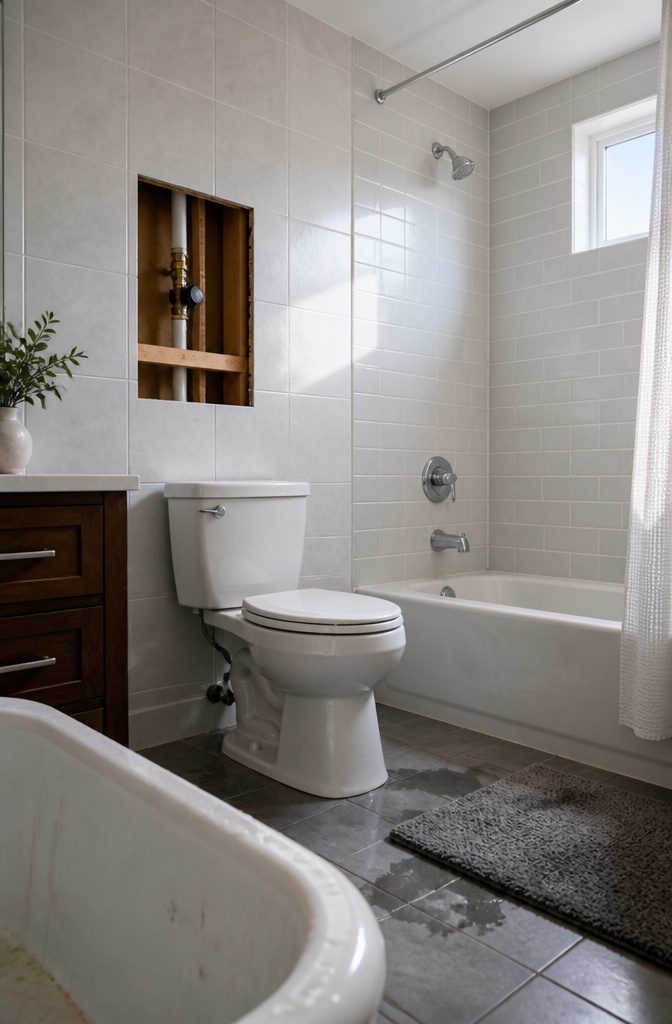
Before you install anything, locate every pipe, valve, and shutoff the panel needs to reach.
A panel that looks clean but leaves you shoulder-deep in drywall next time a connection leaks is decoration, not access. Walk the plumbing run from fixture to shutoff and mark where serviceable parts sit.
If you are working with a tiled wall, plan the opening before you lay a single tile so the panel edges can follow grout lines rather than slicing through them.
The panel should land where tile size and pattern allow a clean rectangle without forcing cuts that interrupt the layout.
Check for studs with a finder before you mark the opening, and trace electrical runs if the wall carries switches or outlets nearby. Cutting into a wire or a supply line turns a clean install into a repair job.
Think through how the door will swing: a panel blocked by a vanity or a toilet tank is harder to use than one placed six inches higher.
Leave clearance in front so you can kneel or stand with tools without backing into the tub.
3. Cut and Frame the Opening
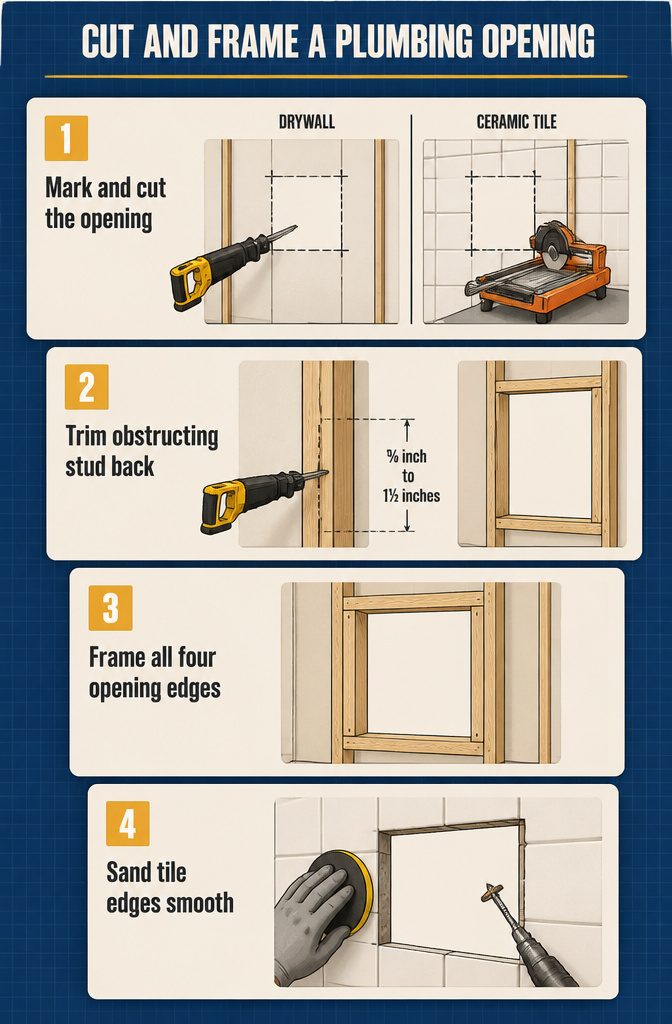
- Mark and cut the opening using a reciprocating saw for drywall or a tile saw for ceramic tile. For drywall, cut a clean rectangle at the marked dimensions. If a stud falls in the middle of the cutout, clip it carefully at the top and bottom of the panel so the drywall rectangle and stud piece come out together. For tile, mark the hatch position on the tile, then cut with a narrow, even gap around the perimeter — uneven edges make the finished panel more visible.
- Cut the stud back by ¾ inch to 1½ inches if one was in the way. Measure the thickness of your framing material, then plunge the reciprocating saw blade through the drywall on the wall and hold it level while cutting. The surgical slit from plunging gets hidden by the trim later.
I measure the thickness of my framing material (either 3/4 in. or 1-1/2 in.) and cut the stud back farther by carefully plunging the blade of my reciprocating saw through the drywall on the wall and holding the saw as level as I can.
That extra clearance gives you room to frame the opening without the new lumber hitting the stud.
- Frame the opening with 2×4 or 2×2 lumber at the top and bottom of the cutout. If you cut back a stud, frame around the entire opening to give the panel solid backing at all four edges.
- Finish cut edges on tile by sanding carefully with a diamond sanding pad, then using a diamond cutting wire for small rounded corners. Sand the inner edges with a finer tool. Precision here keeps the panel from standing out once installed.
4. Build and Finish the Panel
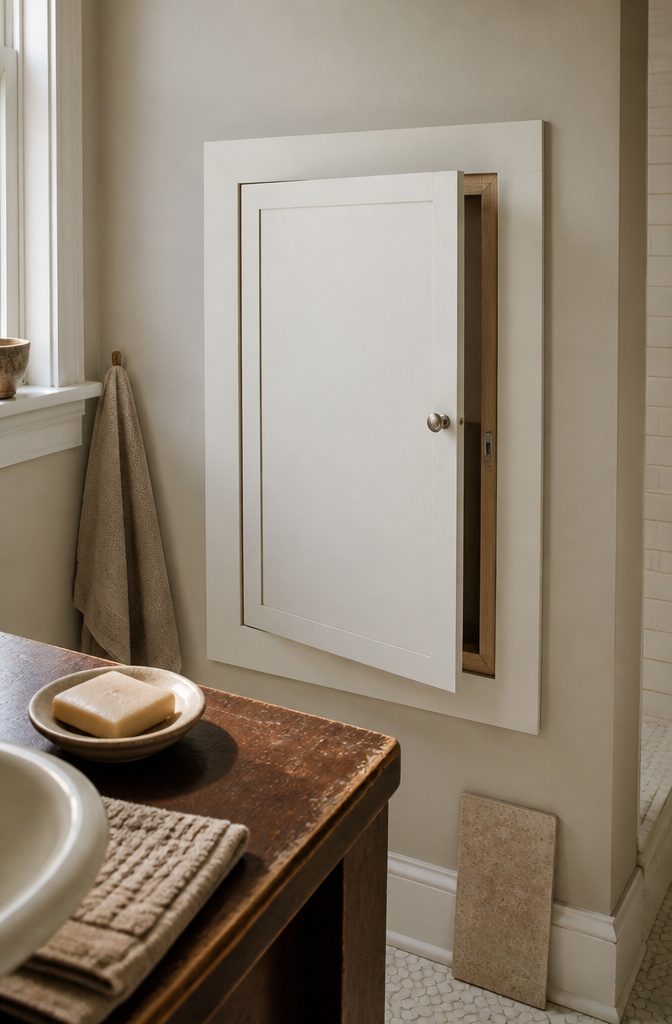
I build the frame from 1×2 boards cut 1/4 inch smaller in each direction than the opening, then attach them with 1-inch drywall screws and construction adhesive.
The undersized frame sits flush against the wall opening and gives the panel something solid to fasten to.
Around the outside, I add trim 2–3 inches larger than the opening on all sides, which hides any uneven cuts in the drywall and makes the whole thing look intentional instead of patched.
For the panel itself, plywood takes paint better than drywall and survives repeated opening without crumbling at the edges.
I sand it smooth with 120- or 150-grit paper, then paint it to match the wall. A pair of magnetic latches holds it closed without visible hardware, and a small knob gives something to pull.
The frame on the inside edge cleans up the opening so you see finished wood instead of raw drywall when the panel is off.
If the wall is tiled, the panel needs to be tiled too.
A tile-integrated access hatch lets the finishing tile become part of the door, so the panel disappears into the surrounding surface instead of sitting there as a different material.
5. Install, Secure, and Align the Panel
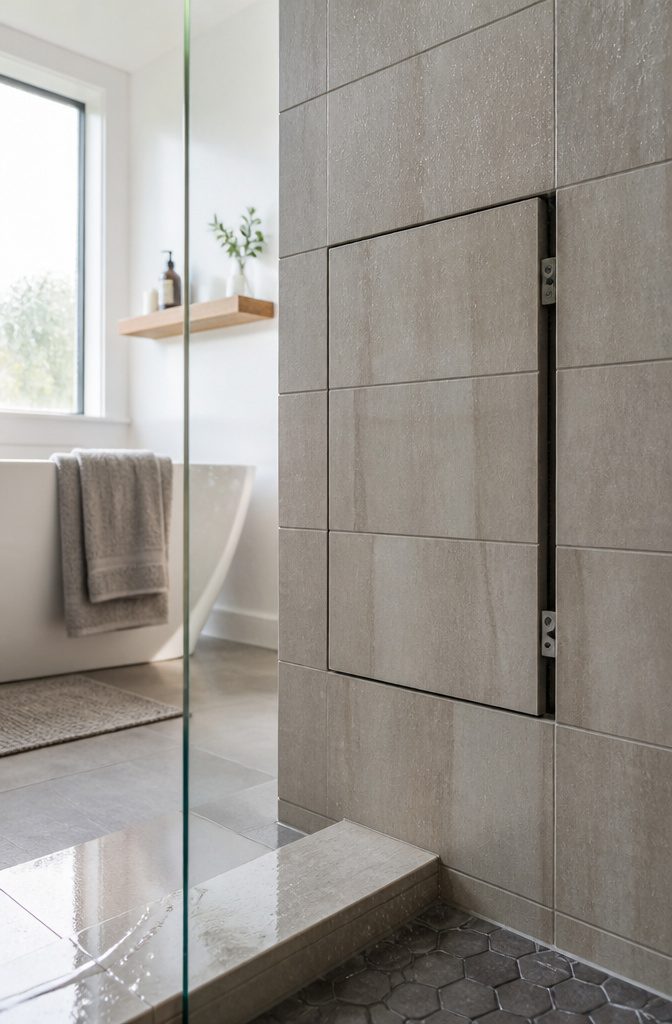
Once the panel is ready, position it in the framed opening and check that the trim covers the sawn edge cleanly.
I countersink screws through the trim on both sides, running them long enough to bite into the studs behind the drywall.
Access panels stay closed most of the time, so this kind of through-fastening keeps them secure without needing latches or magnets. For ceiling panels, screws on all four sides hold the weight and prevent sagging.
Tile-integrated hatches use a different method.
Degrease the back of the hatch and the tile surface before you glue anything. Attach the pressing elements with quick-bonding adhesive in the upper zones, then position the hatch in the opening.
The adjustment screws regulate the perimeter gap, letting you dial in an even reveal all the way around. A flush finish depends on careful alignment here, so take the time to check each side.
6. Check Access and the Finished Appearance
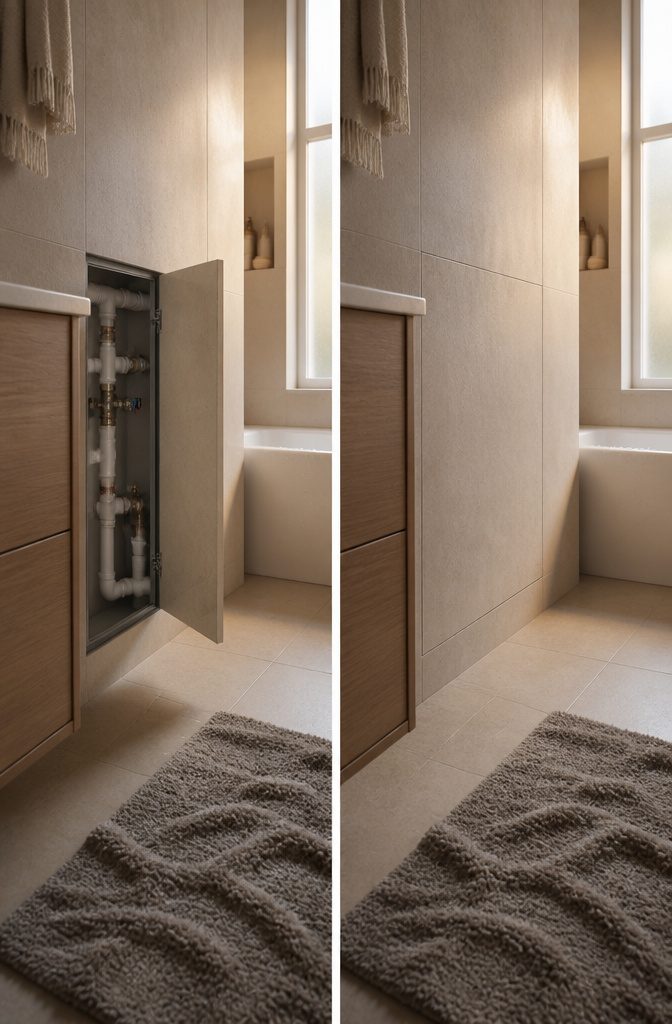
Once the panel is in, check that the door sits flush with the surrounding wall and that the perimeter gap stays consistent from every angle.
Open and close the hatch a few times to confirm the door swings freely and the tile, if you’ve installed one, doesn’t catch on the frame or interfere with the movement.
The panel has to remain functional. Plumbing inspections and repairs depend on access, so a hatch that looks invisible but won’t open fully or requires prying off trim defeats the point.
A flush fit and an even gap around the perimeter signal that the installation went right and that the door will work when you need it, not just on the first day.
Material and Panel Durability
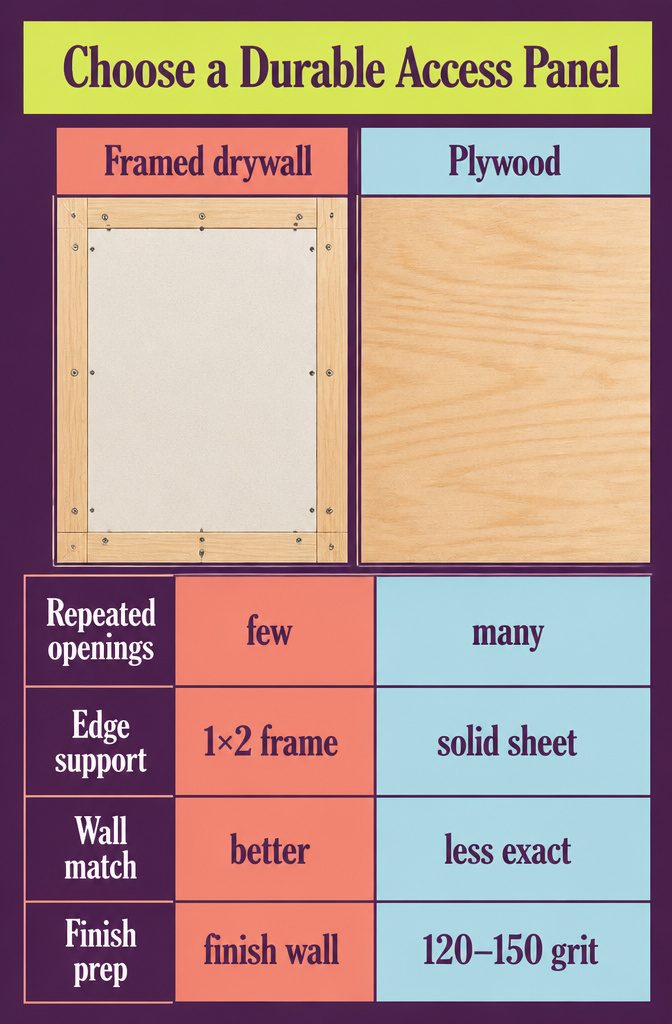
A drywall panel held by screws will work once or twice, but sheetrock crumbles after a few openings.
The material is not built for repeated removal, and each time you unscrew it the edges chip and the paper face tears until the panel no longer sits flush.
For a panel you will open more than occasionally, frame a piece of drywall with 1×2 boards around the perimeter before you finish it.
The frame spreads the pressure when you screw the panel back in, and the drywall itself never takes the load.
Plywood makes a more durable panel when matching the wall finish matters less. Sand it smooth with 120 to 150 grit before you prime and paint, and it will outlast drywall by years.
A purchased access hatch is another option if the panel sits somewhere appearance is not the point, and it removes the finishing work entirely.
I prefer the framed drywall when the panel needs to disappear into the wall, and plywood when I care more about longevity than a perfect match.
Installing a Tile-Integrated Panel
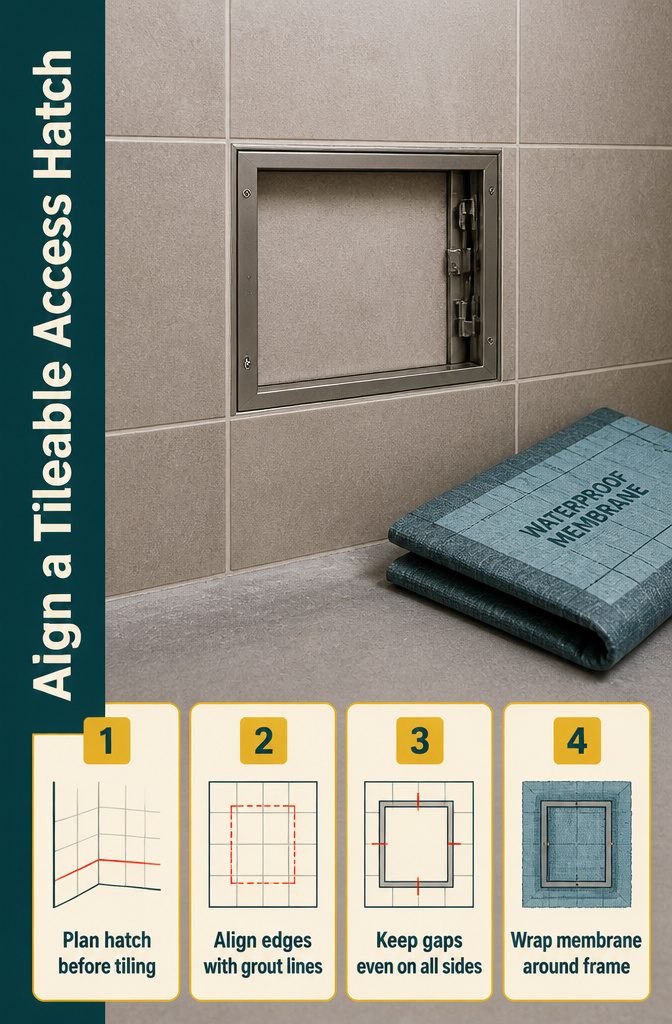
Tiled walls call for a panel designed to carry the tile without breaking its pattern. The frame installs before tiling starts, so plan the panel location with the tile layout, not after the fact.
Measure from a corner or fixed edge to find where grout lines will fall, then position the panel so its edges align with those lines.
A tileable hatch sits flush with the surrounding tile when the cuts are clean and the grout gap stays even on all four sides.
EDPLIT makes tileable panels in sizes up to 400 × 500 mm, enough room for most valve and supply work. The mechanism holds the tile weight, but the panel itself does not waterproof the opening.
If the panel goes into a shower, the waterproofing membrane must wrap the frame and seal continuously around the door gap. A tiled hatch without that membrane just moves the leak from the surface to the edge.
Frequently Asked Questions
How big should a plumbing access panel be?
Size the panel to reach every component that needs service, then add 4 inches for hand clearance.
If a valve, shutoff, and stub-out sit within a foot of each other, a small hatch works. Spread-out fittings require a larger opening.
What is an access panel in plumbing?
A plumbing access panel is a removable section of wall or ceiling that provides entry to pipes, valves, and shutoffs for inspection and repair.
It can be framed drywall, plywood, a purchased hatch, or a tile-integrated door that blends into the surrounding surface.
Can you tile over an access panel?
Yes, but only with a panel designed to receive tile.
The frame must sit flush with the tile surface, the edges need to align with grout lines, and the door has to remain removable. A standard access hatch cannot support tile weight or maintain a clean perimeter gap.
How to build an access door?
Cut a 1×2 frame 1/4 inch smaller than the opening in each direction, attach it with screws and adhesive, then add trim 2 to 3 inches larger than the opening on all sides.
Use plywood for the door itself, sand it smooth, and paint to match the wall. Magnetic latches hold it closed without visible hardware.
How do you hide an access panel in a shower?
Use a tile-integrated panel that aligns with grout lines and receives the same tile as the surrounding wall.
Position the frame before you lay tile, not after. The waterproofing membrane must wrap the frame and seal continuously around the door gap, or water will leak at the edge.