I’ve laid linoleum in three kitchens and can confirm this is achievable. First, I grab graph paper where each square equals one square foot and map the pattern, adding 10% extra for mistakes. Then I let tiles acclimate flat in the room for two or three days without moving them. Next comes subfloor prep: sand the highs, fill the lows, and roll out foam underlayment seam to seam. I dry-fit everything first without glue, cutting edges with a jigsaw for a balanced look. Finally, I seal perimeters with white caulk and pop on shoe molding to hide imperfect cuts. Since nobody needs to know about the flaws, I’ll walk you through the part where I learned not to kneel in wet adhesive.
Map Your Linoleum Pattern and Calculate Materials

Where do I even start with a linoleum floor? I grab graph paper and plunge into pattern planning, each square representing one square foot of my soon-to-be gorgeous space. I tally every color block, then add 10% extra because I’ve definitely mismeasured before, and waste happens.
I map everything: doorways, that weird corner by the radiator. This ensures my design actually fits my quirky room. Getting the tile quantity right prevents panicked hardware store runs at 8 PM.
Once I’ve got my numbers locked down, I think ahead to acclimation and prep my underlayment. I check my subfloor for bumps and moisture, which are common issues that cause problems later. Then I smooth it out before laying down foam cushioning. This prep work prevents installation failures and costly repairs.
Acclimate Linoleum Tiles for 2–3 Days

You know that feeling when you bring home a new plant and immediately shove it in direct sunlight? It wilts, right? I learned the hard way that linoleum tiles need that same gentle introduction. I acclimate my linoleum tiles in the installation room for two to three days, letting temperature and humidity work their magic.
I stack those boxes flat, unopened, right where they’ll live. No peeking. This isn’t fussy perfectionism; it’s me preventing gaps, buckling, or that heart-sinking curl at the edges. The tiles absorb the room’s moisture content, matching their environment to their new home.
I use this waiting period to finalize my cutting schedule. When acclimation ends, I’m ready to roll. This patience results in floors that remain stable and visually consistent for years.
Level the Subfloor and Install Underlayment

How many times have I rushed past this step, only to regret my impatience months later? I inspect my subfloor thoroughly, checking for dirt, moisture, and uneven surfaces. I sand the high spots, fill the low spots, and work toward a smooth surface.
Then comes the underlayment, that foam buffer layer. I roll it out seam to seam, trimming edges with my utility knife until it forms one continuous layer across the floor.
| What I’m Doing | What It Looks Like |
|---|---|
| Sanding ridges | Dust motes dancing in afternoon light |
| Laying foam sheets | Clouds settling over plywood |
| Pressing seams | Fingers smoothing a bedsheet |
I let everything acclimate and settle. This base is the foundation, literally. A properly leveled subfloor with sealed seams prevents future movement, squeaking, and uneven wear on your finished flooring.
Dry-Fit, Cut, and Lock Your First Tiles

The moment of truth arrives. My hands get a little shaky here. I grab my spacers, wedge them against the baseboard, and start my dry-fit. I lay that first tile in the corner, tongue edges facing out, building left to right like I’m reading a book. The alignment needs to be precise. I step back, squint, shuffle pieces around until the layout feels balanced. Those edge cuts can’t look lopsided. When I hit tight spots, I shave the groove with my chisel, trim the right edges, and test again. No adhesive yet, just patience and tweaking. Once the pattern clicks, I’m ready to lock it down.
Solve Tight Spaces, Seal Edges, and Add Molding
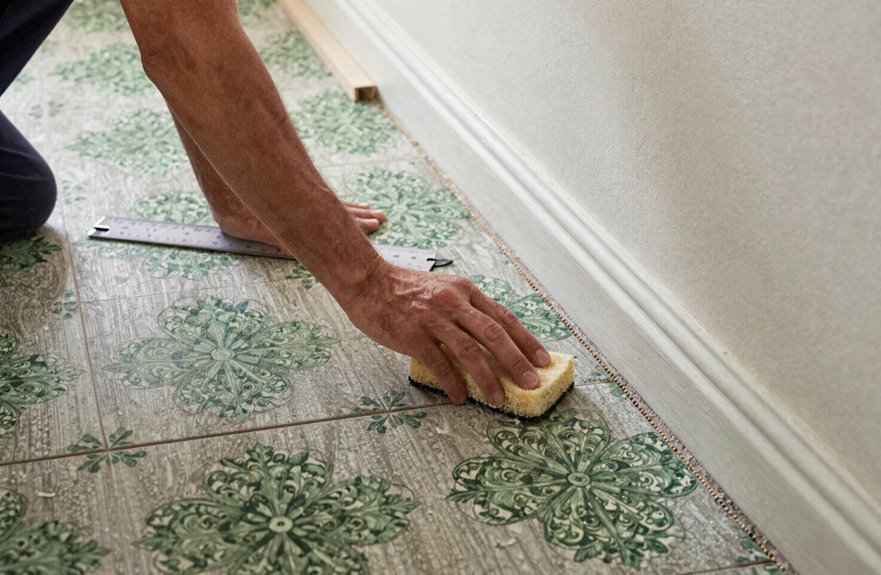
Tight spaces are where linoleum dreams go to die, or so I thought until I wrestled my first baseboard heater. You can’t angle tiles under those beasts, so I shaved the groove on my second-to-last course with a chisel, then trimmed the right edges of my final tiles before smearing adhesive caulk into the receiving grooves. It worked.
For weird corners, I dry-fit with spacers, notched tiles with my jigsaw, and made sure four-tile intersections sat flush. Wipe that squeezing adhesive immediately. Dried glue becomes your enemy.
After the last course drops, run a thick bead of paintable white caulk around every perimeter and obstacle. Then pop on shoe molding to hide the gap. You’ll stand back, breathe deep, and see the finished floor sealed properly with no visible gaps or exposed edges.