Vintage kitchen utensils look best when the display method matches how often you use them.
Daily tools belong on open rails or in countertop crocks where you can grab them without opening a drawer, while pieces you rarely touch but want to see stay cleaner behind glass or mounted on the wall.
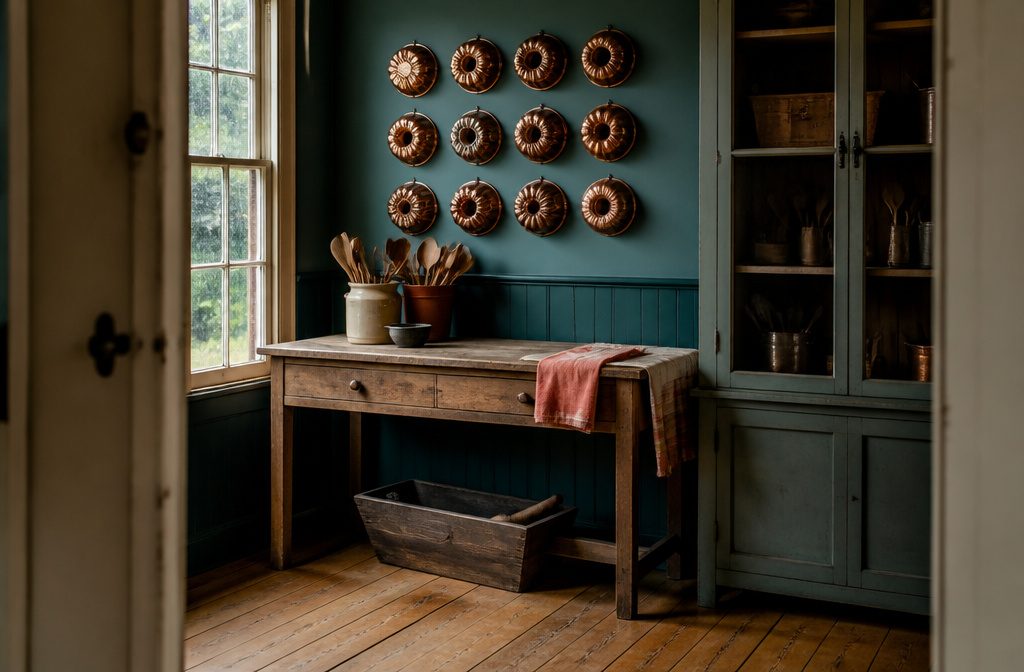
Virginia Tupker hung copper gelatin molds in a Connecticut kitchen instead of framed art, giving the room character that tied directly to its purpose.
1. Group Small Utensils in a Crock, Jar, or Vase

Grouped in a crock, jar, or vintage pitcher, small utensils stay within arm’s reach while the holder itself becomes part of the look.
I like using a vintage ceramic crock or a decorative vase for this, the kind that brings character to the counter instead of just sitting there doing storage duty.
A tall stoneware pitcher works just as well, and if you already own a vase you love but rarely fill with flowers, this gives it a daily job.
The holder anchors the display.
Wooden spoons, whisks, and slotted spatulas fill the interior, but what you see first is the vessel holding them. A sleek mango wood holder fits a minimalist kitchen, while a vintage ceramic option suits a cottage aesthetic.
Either way, the shape and finish of the container matter as much as what goes inside it, so choose one that reflects the style you want on the counter, not whatever came free with a knife set.
2. Hang Utensils from a Rail, Pot Rack, or Hooks
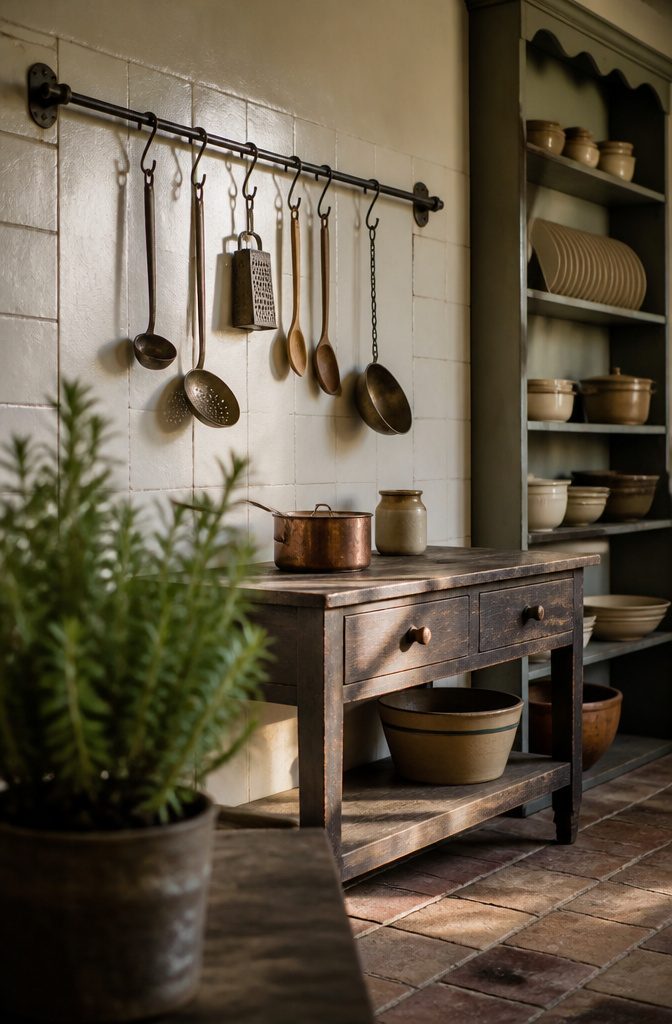
Hanging pots, pans, and utensils keeps the pieces you use most within arm’s reach while turning them into working decor.
A rail mounted above a stove or countertop holds everything from ladles to cheese graters with S-hooks, and the spacing means each piece stands out rather than crowding the next one.
Cast iron or copper racks lean into the vintage look naturally, and you can adjust the height of each utensil with chain if the rack allows it.
I group similar tools together when the collection is large enough—wooden spoons in one cluster, ladles in another—but a mix of mismatched shapes works just as well if that is what the drawer gave up.
The copper pipe DIY pot rack and the 1930s hanging apparatus both prove the method has been practical long before it became a Pinterest staple.
Cooks who reach for the same pan three times a day do not want it behind a cupboard door, and open storage like this delivers on that without looking purely utilitarian.
3. Display Utensils on Open Shelves
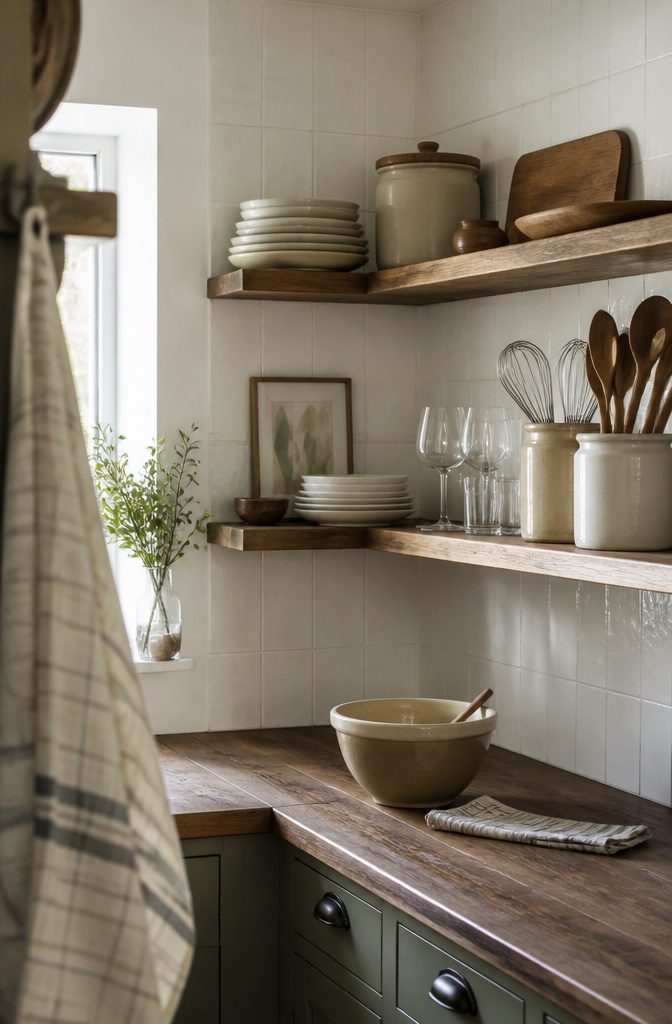
Open shelves let you show off vintage utensils alongside everyday plates and glassware, turning practical storage into display.
The approach works whether you lean into a uniform collection of similar pieces or mix metal whisks, wooden spoons, and ceramic crocks for something more eclectic.
Either way, the shelves feel more personal than closed cabinets, and you control exactly what stays visible.
An L-shaped shelf makes good use of corner space and gives you two surfaces to work with.
Layer in stemware on one leg, cookware on the other, and slip a small photograph or piece of art between the utensils if the shelf runs deep enough. The utensils anchor the arrangement without demanding the whole display.
The line between practical and decorative blurs here.
If you chose the pieces with care, they are good to look at whether they hang idle or get pulled down for use. Closed storage hides that judgment, and open shelves put it where it belongs.
4. Use a Glass-Front Cabinet
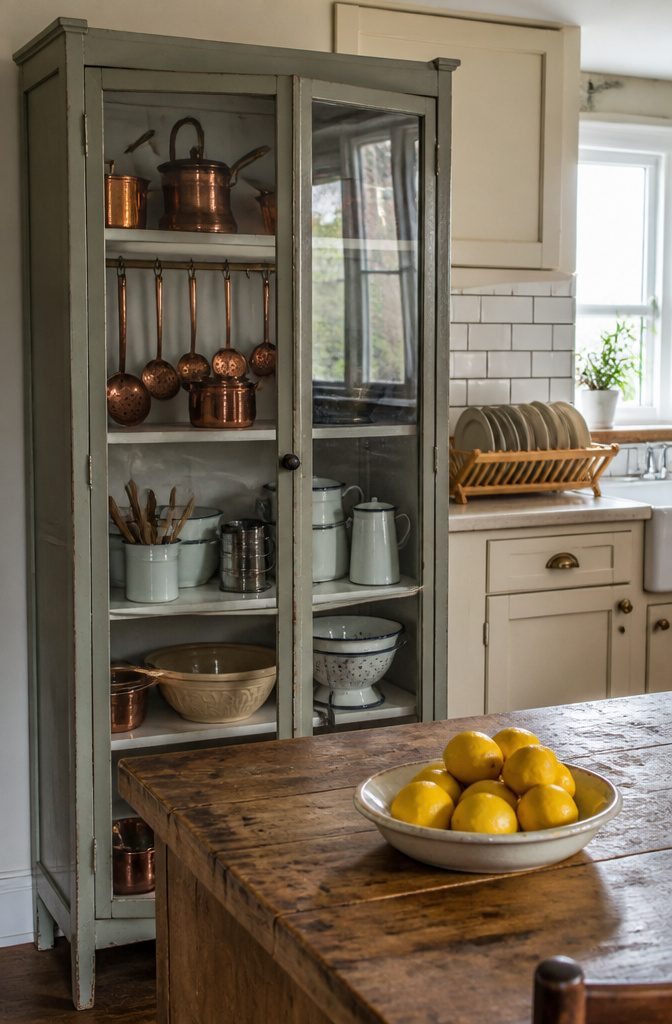
A glass-front cabinet keeps vintage utensils visible while protecting them from kitchen grease and airborne dust.
The physical barrier solves one of the main drawbacks of open shelving without losing the decorative appeal of the collection itself. You can still see what you own, but you’re not wiping down each piece before you use it.
The shelves inside let you group tools by function or material. One shelf might hold baking items like sifters, apple corers, and mixing spoons, while another displays stove tools such as slotted spoons and ladles.
Organizing by material works just as well: copper on one level, enamelware on another. Plate holders and book holders prop up colanders and gelatin molds so their shapes read from the front rather than disappearing flat against the back wall.
5. Arrange Utensils in a Shadow Box
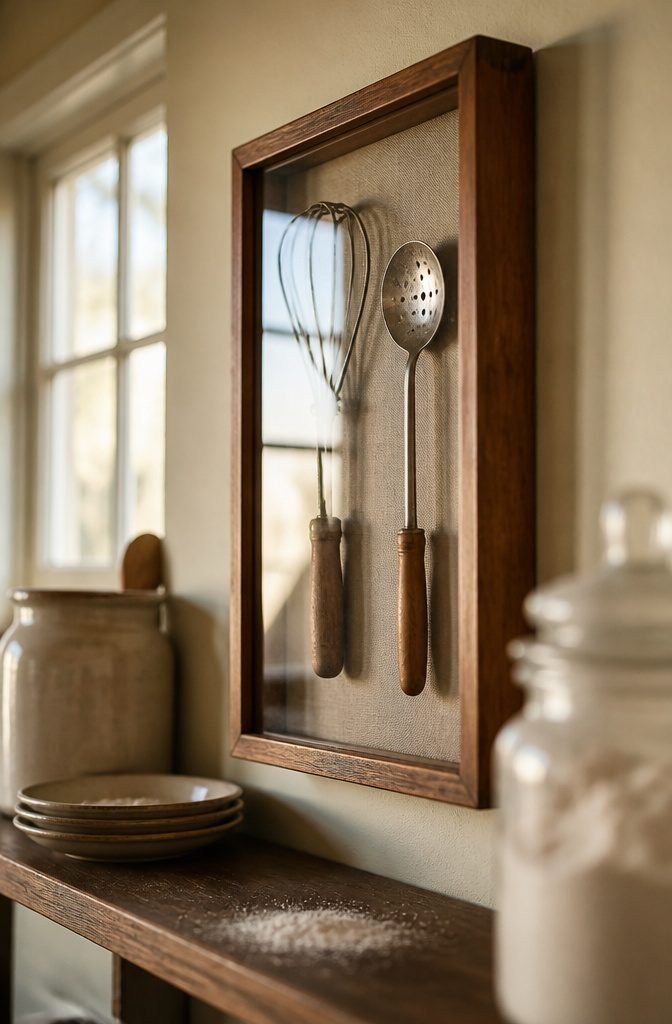
Shadow boxes hold single utensils or small groups, and they sit well on shelves or hang on walls without taking up counter space.
Most come glass-covered and deep enough for three-dimensional objects, which matters when the handle curves or the blade sits at an angle.
Craft stores stock them in sizes from five inches square to twenty inches wide, so you can match the box to the tool and the wall space you have.
If the backing fabric clashes with your kitchen, fabric glue lets you swap it for something that coordinates.
Old shadow boxes turn up at estate sales and antique shops, and they often arrive with better joinery and thicker glass than the new ones.
6. Lean or Stack Cutting Boards as Decor
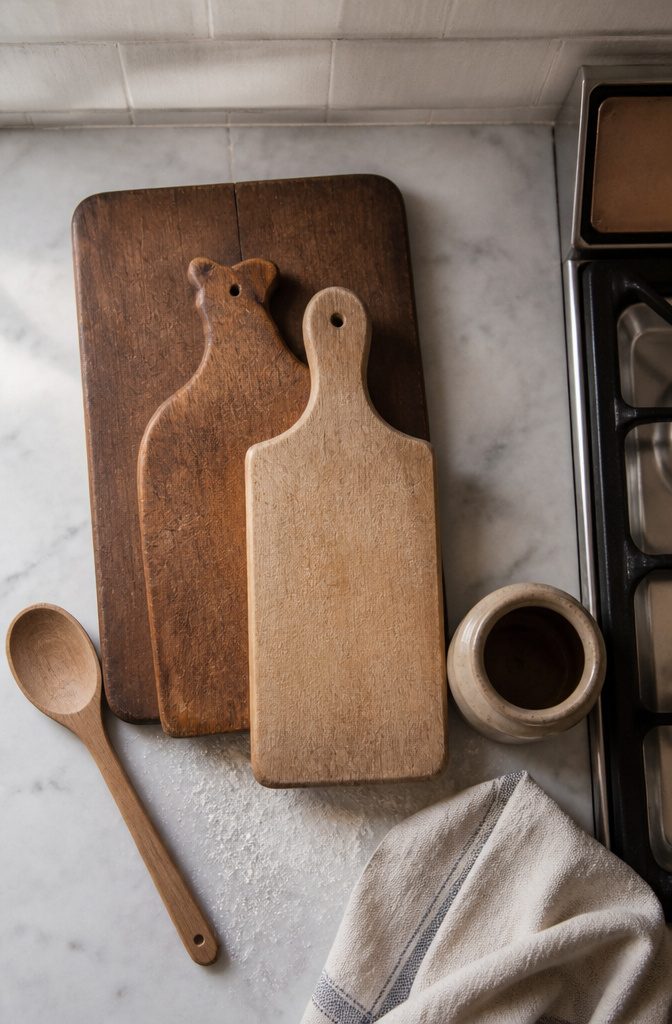
Cutting boards and breadboards work beautifully when you lean them upright or stack them in layers rather than hanging them flat.
The grain, the wear, and the varied thickness give you texture no single board can deliver, and propping two or three together turns them into a backdrop worth looking at.
Stacking works especially well when the boards differ in size or shape.
Animal-shaped cutting boards make an easy pairing this way: set a smaller decorative board in front of a larger one, then layer in a few other vintage pieces at the base.
The boards hold the eye without competing, and the result feels deliberate rather than cluttered.
I lean mine on open shelves or against the backsplash near the stove, angled just enough to stay upright without hardware.
Breadboards with handles or decorative cutouts add silhouette when they sit in the back row, and plain maple or walnut boards anchor the front.
The look is loose but not haphazard, and swapping one board for another takes seconds when the mood shifts.
7. Hang Plates or Molds on the Wall
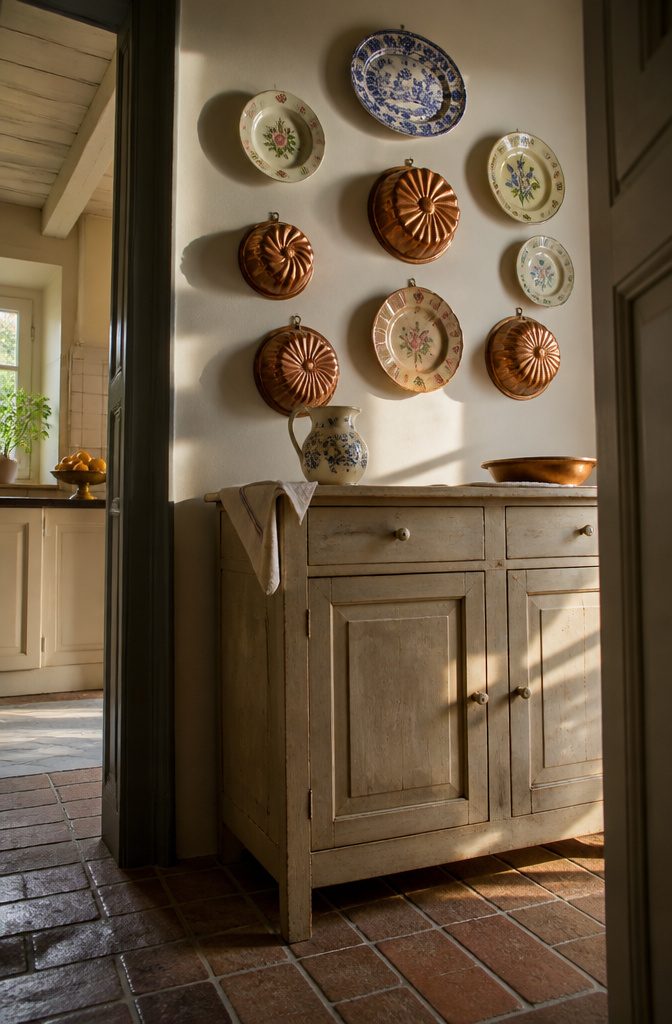
Plates with hand-painted patterns, copper gelatin molds, and decorative china work as wall art in a kitchen when framed pieces feel too formal or plain.
Hang them in place of traditional artwork to add character that ties directly to the room’s purpose, and the effect feels intentional rather than like you ran out of cabinet space.
Virginia Tupker mounted vintage copper gelatin molds on the wall of a Connecticut kitchen in a studied but seemingly random arrangement, skipping utilitarian pots and pans in favor of pieces that connected to the home’s history.
The molds brought in warmth and visual weight without adding clutter to the counters.
Wire plate hangers let decorative china float like framed art, which works well for family heirlooms or antique pieces you want to see daily but not risk using.
If the plates matter to you or mark a specific era, displaying them keeps them part of the room instead of hidden in a cupboard.
That bit of personality makes the space feel more like yours and less like a rental.
8. Use a Basket for Larger Collections
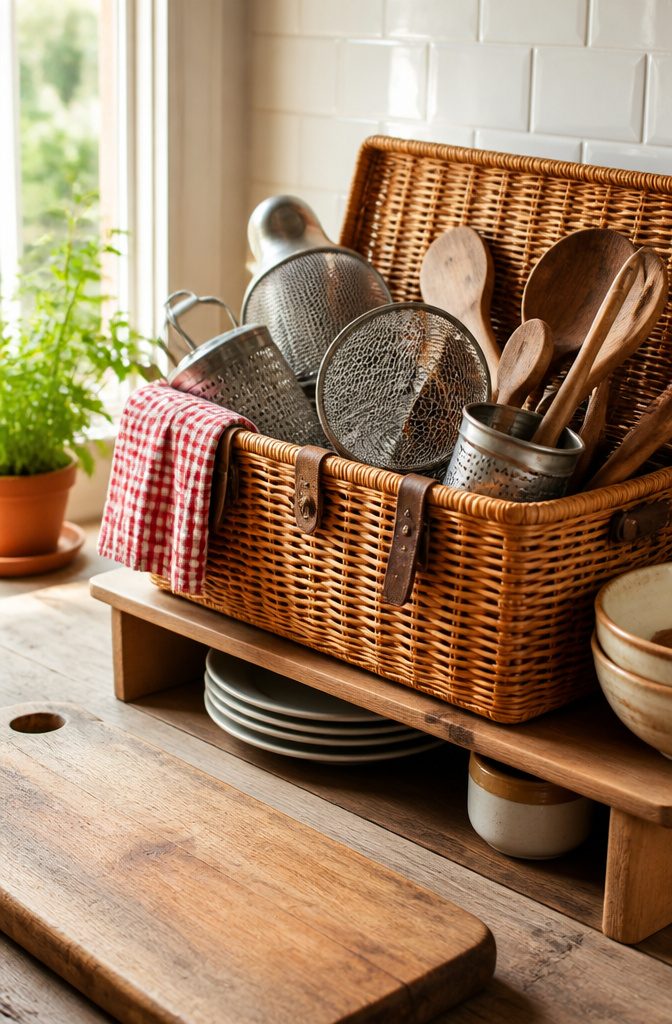
A picnic basket fits the larger pieces that outgrow a crock or jar: flour sifters, wire strainers, the wide wooden spoons that stick out at angles.
The woven sides and open top let you reach in without moving everything else, and a basket scaled for a full picnic holds more than you expect without looking crowded.
I fold a gingham tablecloth or an embroidered dishtowel over one edge to tie the basket into the room. The cloth softens the wicker, adds a second texture, and brings in a color that pulls from the cabinets or tile.
A solid linen towel keeps the focus on the tools; a vintage print with fruit or roosters doubles down on the era.
Make the Display Both Useful and Decorative
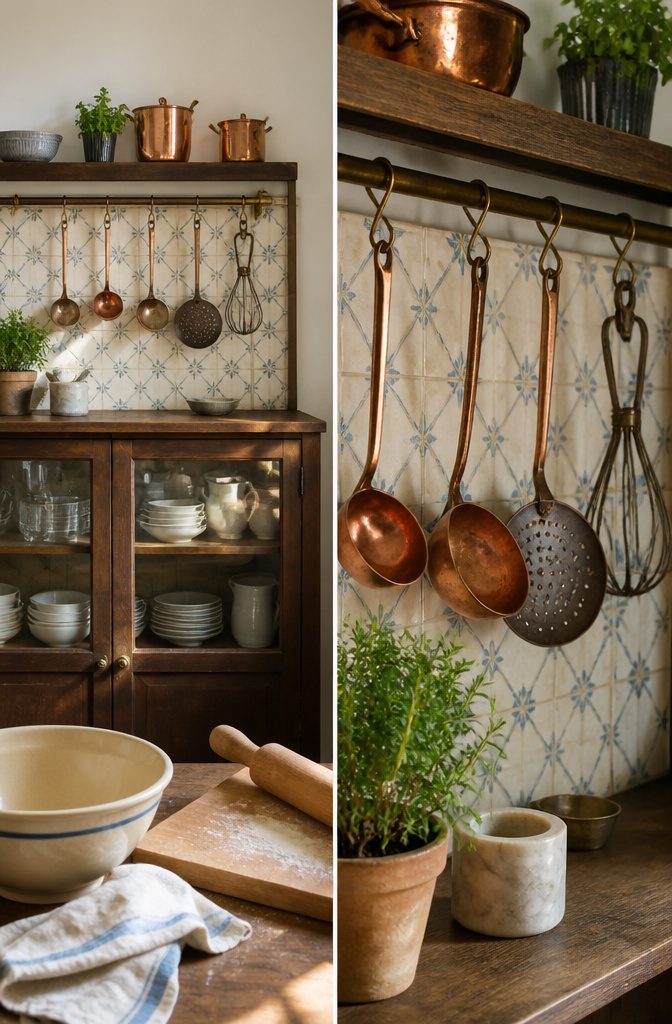
The best vintage utensil displays do double duty: they keep the items you reach for most within easy reach and add character at the same time.
Open storage makes everyday tools easier to grab than digging through a drawer, and when those tools happen to be a set of copper ladles or wooden spoons worn smooth from decades of use, leaving them visible turns function into decoration.
Glass-front cabinets split the difference if you want the look of open shelving without the dust.
They protect glassware and tableware from grease while still showing off the collection, and you can arrange pieces by color or shape the way you would on an open shelf.
The physical barrier matters more in kitchens that see heavy cooking, where airborne oil settles on everything left exposed.
For items used daily, hanging storage wins. A pot rack or rail with S-hooks puts ladles, strainers, and beaters exactly where you need them, and adjusting chain length on each hook gives odd-shaped tools their own space.
Magnetic strips handle knives and scissors the same way. The pieces stay clean enough to use without a pre-rinse, and the visual weight of a full rack adds warmth to a plain wall.
Group or Arrange Objects Deliberately
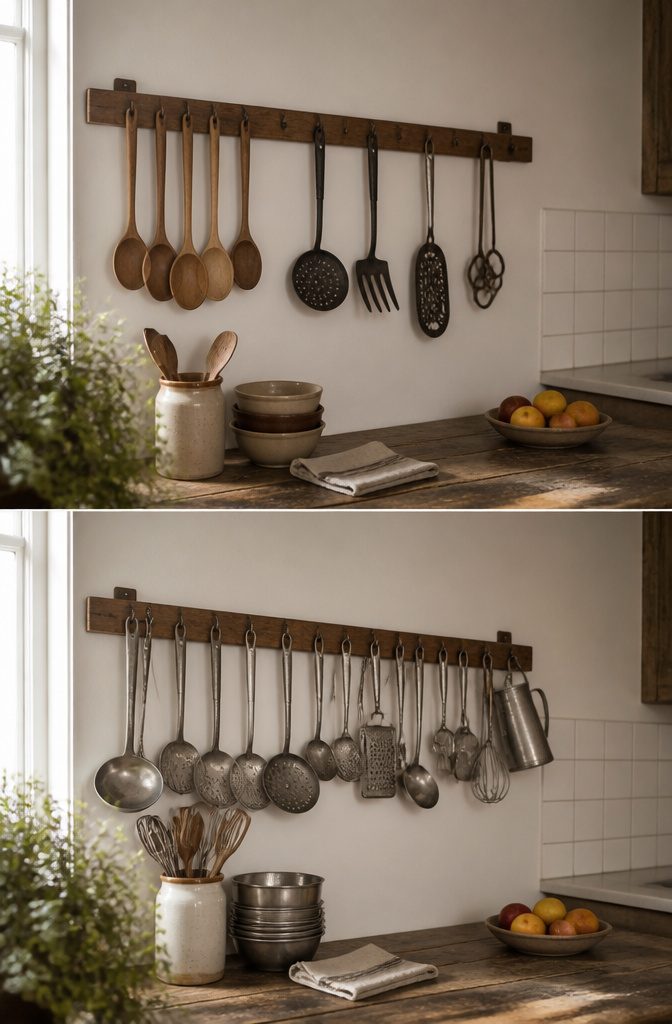
Hanging similar objects together makes a harmonious display. A group of ladles or a cluster of wooden spoons reads as a deliberate choice, and the repetition gives the collection more visual weight than scattering the same pieces across different spots.
The eye registers the pattern first, then the individual details.
Grouping by shared qualities pulls a display together fast.
Cast iron utensils in one area, wooden tools in another, or all the long-handled pieces on a single rack. The shared material or shape becomes the organizing idea, and the display feels more considered without much extra work.
A display of mismatched tools creates an eclectic presentation, but only if each piece has enough space to register on its own. Odd-shaped utensils such as egg beaters and cheese graters need room to breathe.
When everything crowds together, the display reads as clutter instead of a considered collection. Spacing the utensils far enough apart lets each one have visual impact.
Frequently Asked Questions
What is the best way to organize my kitchen utensils?
Store frequently used utensils in a crock or jar on the counter, hang them from a rail with S-hooks, or keep them on open shelves where you can see and reach them easily.
Glass-front cabinets work well if you want to protect pieces from grease while keeping them visible. Group similar tools together by material or function so the display feels deliberate rather than cluttered.
What to do with old utensils?
Display vintage utensils as working decor by hanging them on pot racks, storing them in crocks or baskets, or arranging them in shadow boxes and glass-front cabinets.
The pieces you use daily stay accessible on rails or open shelves, while heirloom or decorative items work as wall art when mounted like plates.
Grouping by material or shape turns a collection into something worth looking at instead of hiding it in drawers.
What does a vintage kitchen look like?
A vintage kitchen displays copper molds, wooden spoons, breadboards, and hand-painted china as decor alongside cookware in daily use.
Open storage like pot racks and glass-front cabinets keeps utensils visible, and materials such as cast iron, stoneware, and enamelware add texture and warmth.
The look blends function with decoration, so everyday tools double as the character pieces that make the space feel personal.