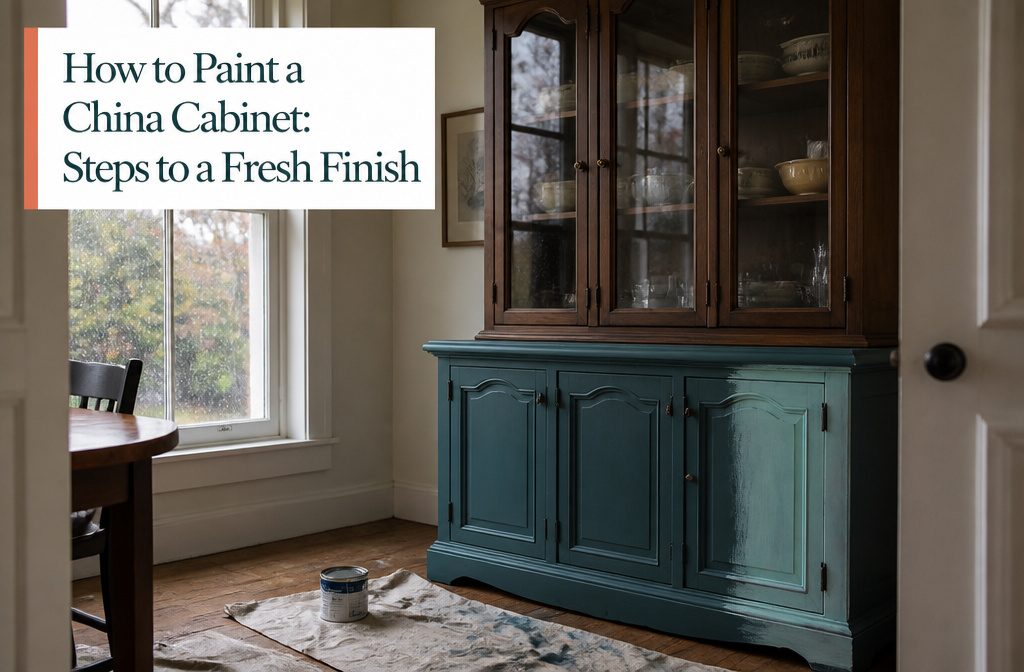
A painted china cabinet takes two to four coats depending on the color shift, plus a full day between some of them if cleaning residue is still off-gassing.
Most people rush the first coat and then spend the second one fixing streaks. White over dark stained wood will cost you four coats no matter how carefully you apply the first one.
1. Plan the Look and Choose What to Paint
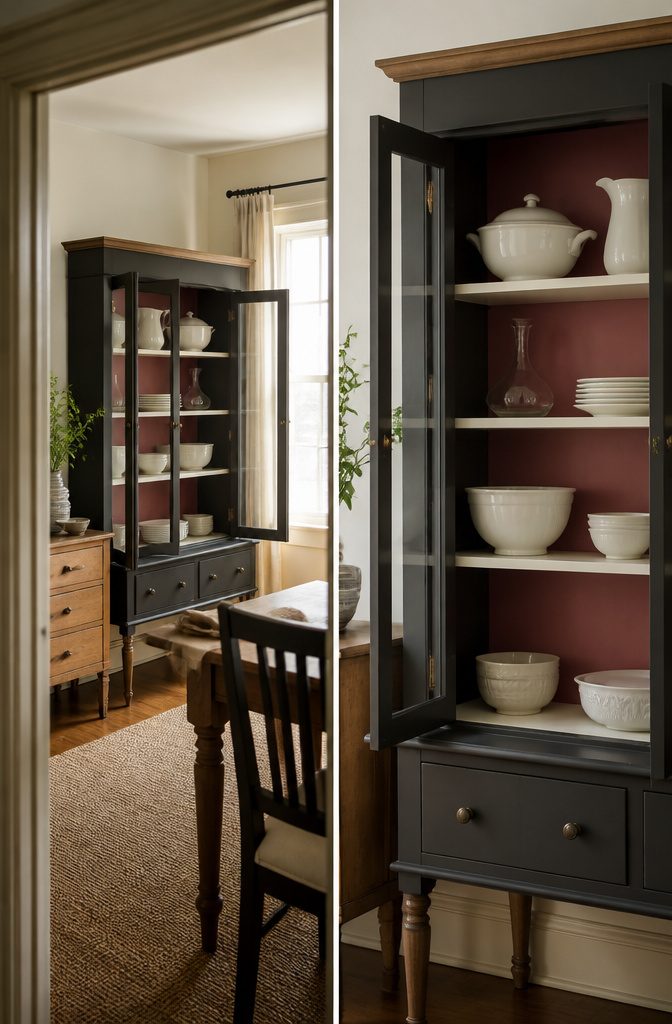
The first choice is color. Black paint over most of the cabinet with the legs left in stained wood creates contrast without losing the original grain.
White inside the cabinet with dark gray on the exterior splits the piece visually and keeps the interior from feeling heavy when the doors are open.
Another approach: dark chalk paint on the outside, cream inside to balance the weight of the darker finish.
A stained wood top anchors the piece when the rest is painted.
One source sanded the top back to bare wood and finished it with pickled oak stain after painting the body. The natural wood breaks up an all-over painted look and gives the eye a place to rest.
Painted interior backs add a second layer of color.
Red behind white dishes, or a shade that pulls from wallpaper, turns the inside into display space rather than storage. The back panel takes color better than the shelves, which see more wear.
2. Remove Hardware and Detachable Parts
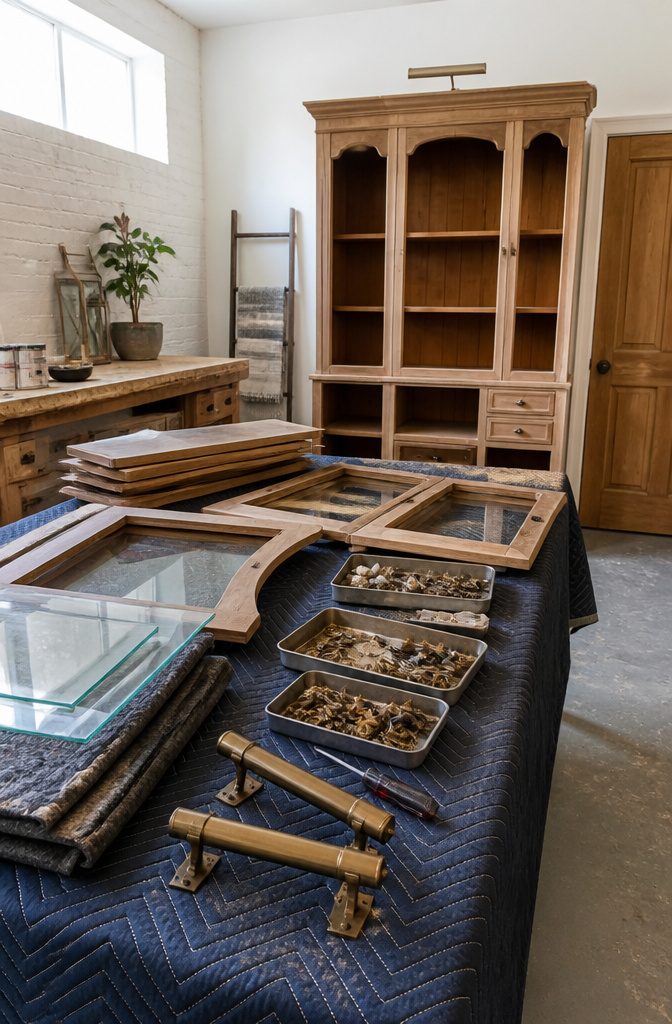
Pull every piece of hardware off before you touch paint. That means knobs, handles, hinges on the doors, and any latches that hold them closed.
If the cabinet has shelves that lift out, take them down. Glass panels come out too, whether they sit in the doors or rest on the shelves themselves.
Some older cabinets hide extras you won’t expect until you open the back. Picture lights screwed through the cabinet walls show up more often than you’d think, especially on pieces from the 1980s.
If the wiring runs through drilled holes and you’re not planning to keep the lights, cut the plugs and pull the whole assembly out through the back.
It’s faster than working around them, and you won’t risk getting paint on a cord or socket.
Taking the doors off completely gives you room to work and lets you lay everything flat when it’s time to paint. Flat surfaces take coats more evenly than vertical ones, and you won’t fight drips.
3. Clean and Sand the Surfaces
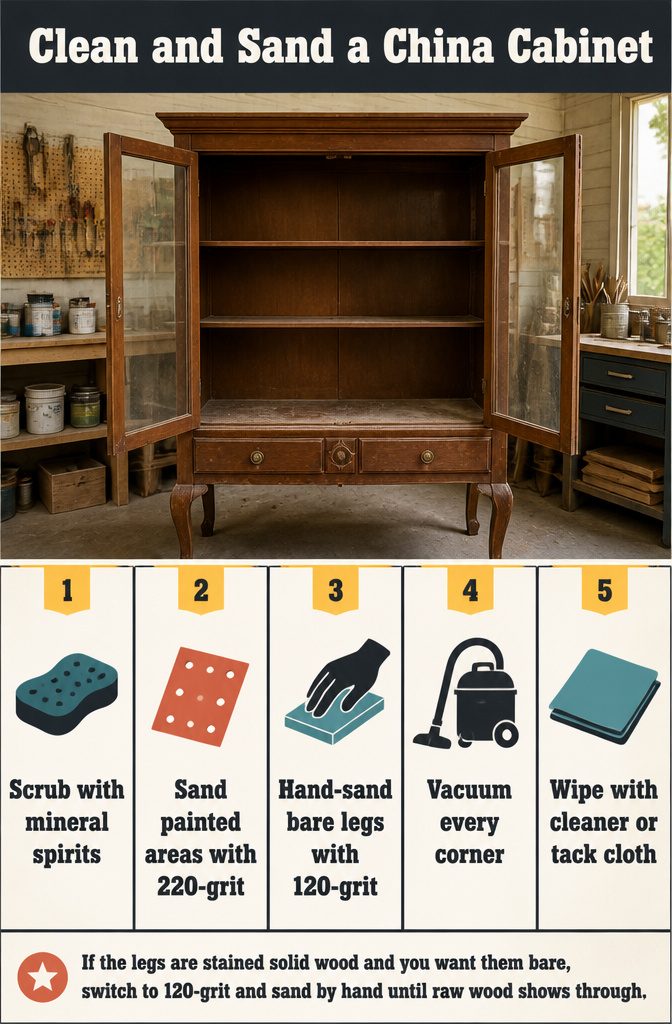
Start with mineral spirits and a soft scrubbing sponge to lift grime from every surface you plan to paint.
The spirits cut through old wax and kitchen grease better than dish soap, and they dry fast enough that you can sand the same afternoon.
Once the cabinet is dry, sand any painted or veneered areas with 220-grit sandpaper. The finer grit roughs the surface just enough for primer to grip without tearing through thin veneer.
If the legs are stained solid wood and you want them bare, switch to 120-grit and sand by hand until raw wood shows through.
Vacuum every corner, then wipe the whole piece with pre-paint cleaner or a tack cloth to pull off the dust that settled back down.
Some painters skip sanding entirely and go straight to primer, counting on a bonding formula to do the grip work.
That shortcut holds up on cabinets that sit still, but I would rather spend twenty minutes with sandpaper than wonder if the finish will lift when the first dinner plate knocks a shelf.
4. Fill Holes and Prime Where Needed
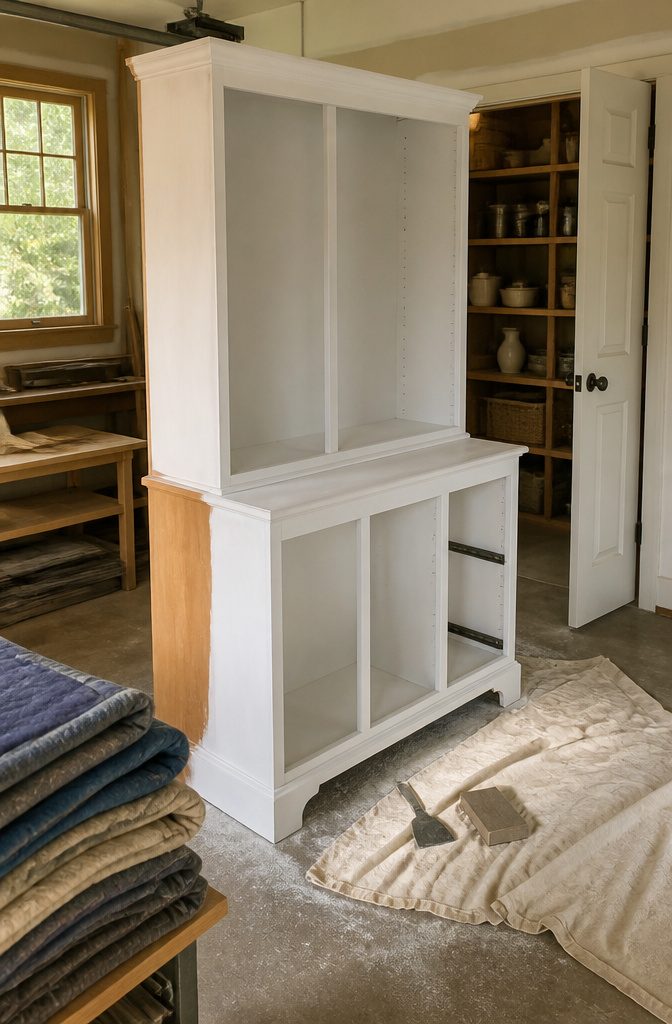
Once the hardware is off, scan the cabinet for damage left behind. Screw holes get filled with wood filler — DAP Plastic Wood spreads on with a small knife and dries ready to sand.
For holes through the back panel where there’s no backing to hold the filler in place, you need a different move.
Cut a thin piece of balsa wood larger than the opening, glue it over the hole from behind, and tape it flat while the glue sets.
Once dry, peel off the tape and fill over the patch the same way you would fill any other hole.
After repairs, a light sanding preps the whole piece for primer. I prime with Zinsser BIN because it blocks tannin stains from bleeding through later coats.
That matters when you’re painting white over stained wood — yellow bleed-through shows up fast, and BIN stops it before it starts. One coat covers the cabinet, inside and out, and you’re ready for paint.
5. Apply Paint in Coats
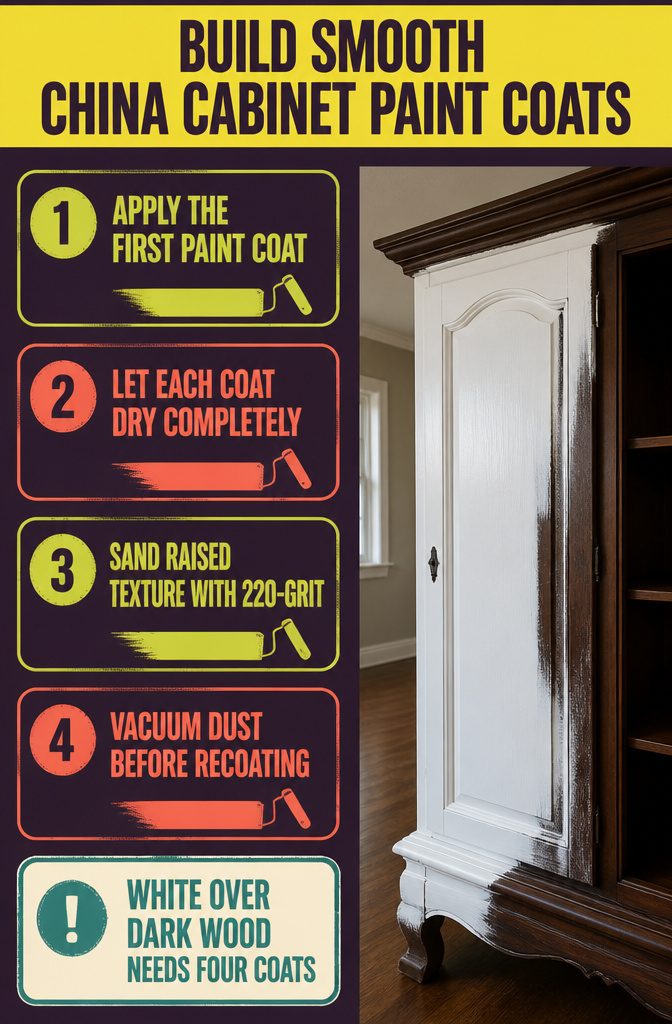
The first coat goes on quickly, but white over dark wood or bold colors over pale finishes need patience.
Two coats cover most pieces when you’re working with similar tones—Behr chalk paint in Ottertail took two passes, and Kilz in Toasted Poppyseed did the same.
White paint over dark wood demanded four coats, which meant two unplanned trips back to the paint store mid-project.
Between coats, I let the paint dry completely—no shortcuts. Once dry, a quick sand with 220-grit paper smooths any raised grain or texture before the next layer.
The sanding dust vacuums off easily, and the cabinet’s ready for another coat within minutes. General Finishes Lamp Black required three coats after a full 24-hour wait for cleaning products to evaporate; any residue interferes with adhesion.
Chalk paint feels slightly rough to the touch until a topcoat seals it, so the texture improves with the final step rather than during the painting itself.
6. Add Protection, Distressing, or Decorative Finish
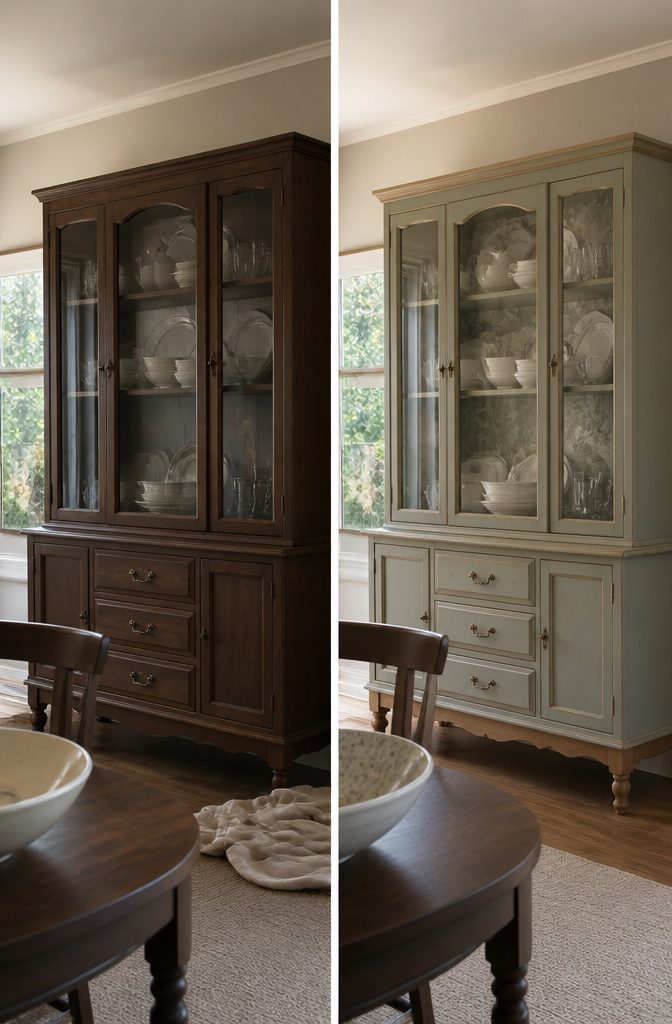
Once the paint cures, you have a few ways to finish.
Distressing softens new paint into something that looks lived-in: 220-grit sandpaper along the edges and corners brings back a little of the underlying wood or primer, then a quick vacuum pulls out the dust.
Hemp oil seals the surface after, buffed dry with shop towels. The cabinet legs can carry a contrasting gel stain if you want darker definition down low—Nutmeg adds warmth without covering the grain.
A clear topcoat protects high-touch spots like drawer fronts and door edges.
Any dust left in the brush shows up as dark specks in the wet finish, so if contamination happens, sand it smooth once dry and apply a second coat.
Chalk paint wax is another option after the paint sets. White wax deepens the finish without yellowing it, and you can add metallic accents to trim or raised panels with gold leaf paint.
If you sanded the top down to bare wood, stain it once the dust is gone.
Picked oak keeps the tone light. For the cabinet back, peel-and-stick wallpaper drops in without paste or mess—measure the panel, cut to fit, smooth it with a card edge, and repeat for any remaining sections.
7. Finish the Hardware and Reassemble
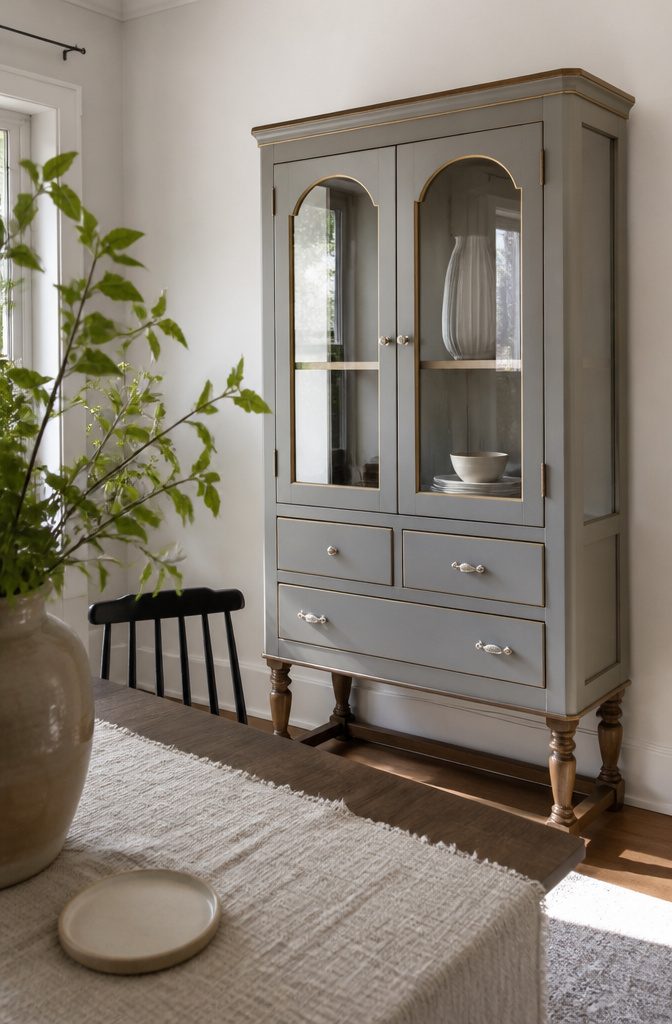
Once the paint is fully cured, reattach the hardware or swap it for something new. New drawer pulls can shift the whole look without touching the finish you just put down.
One cabinet kept its original hinges but got fresh pulls from Hobby Lobby, and the back plate got a light sand with 220-grit sandpaper before a coat of gel stain matched the legs.
A few raised details picked up a touch of gold to tie the piece together.
If you’re keeping the original hardware, spray paint works.
A quick coat of silver followed by a second brings tired metal back without replacing it. Poke screws into a cardboard flap so you can spray the fronts without handling them wet.
I’ve also pulled a glass shelf when I needed height for taller stems or a vase. The cabinet adjusts to what you’re using it for, not the other way around.
Paint Types and When to Use Each
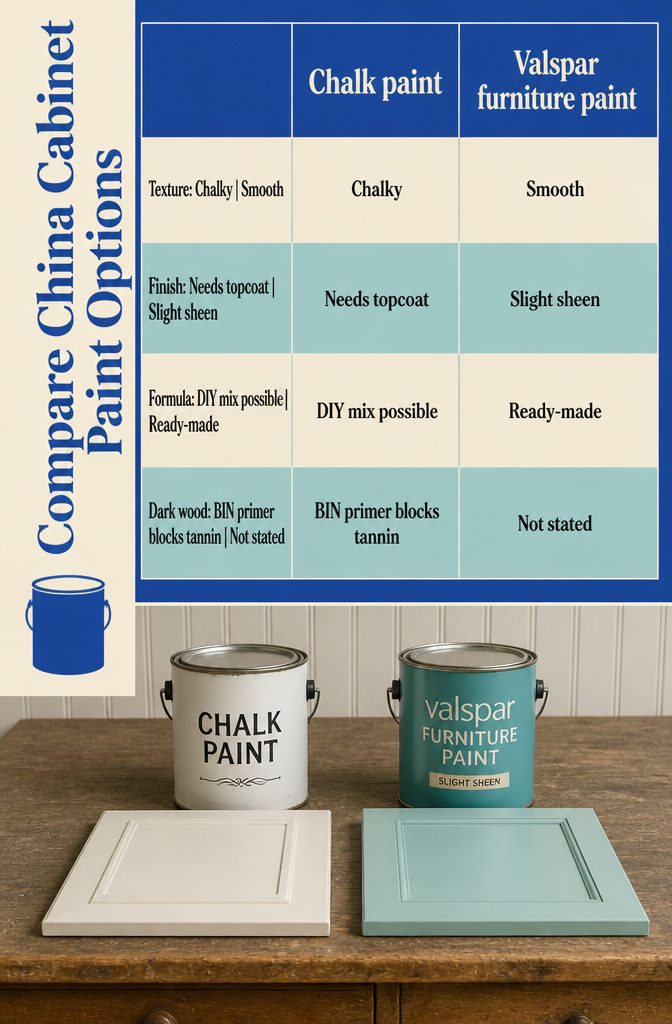
Chalk paint showed up in four of the makeovers I looked at, and each one used a different brand.
The Kilz version in Toasted Poppyseed went on dry enough that it needed water added mid-project, and the can separated even after shaking.
FAT Chalk Paint in Warm White covered better but felt strange to the touch until the clear coat went on. Behr’s Ottertail shade performed consistently across coats.
If you want full control over the formula, mix 1/3 cup warm water, 1/3 cup Plaster of Paris, and 1 cup of your chosen paint color for a DIY batch that behaves exactly how you want it to.
Valspar furniture paint with a slight sheen skips the chalky texture entirely and gives a smoother result right out of the can.
When you are painting over dark stained wood and want white or a light color, Zinsser BIN primer blocks tannin bleed before it starts.
Adding Wallpaper Inside the Cabinet
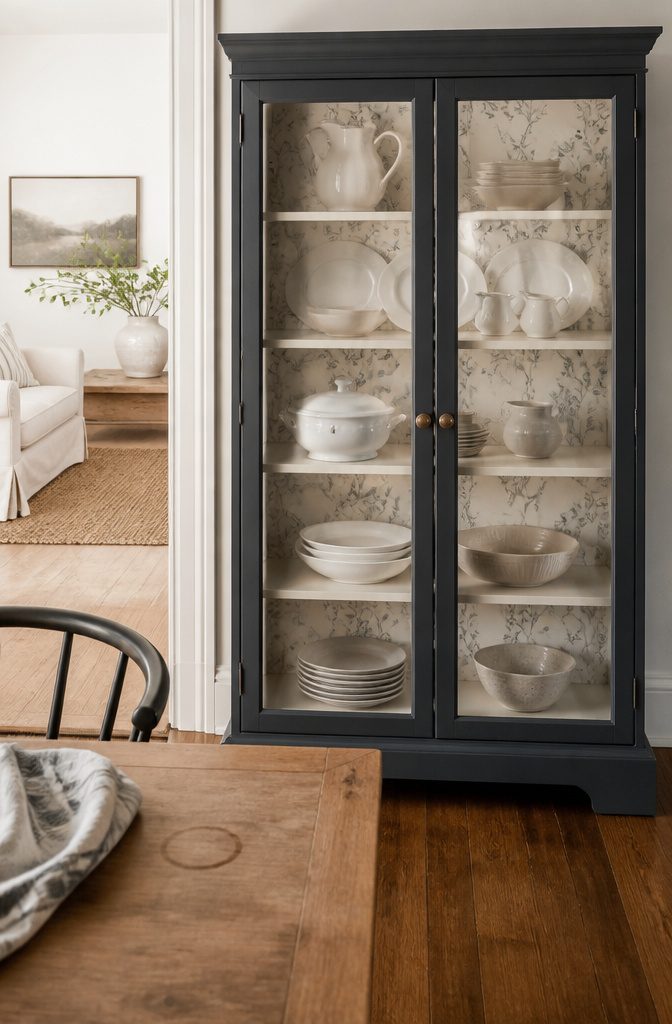
Wallpaper on the back panel or interior shelves gives a china cabinet depth without adding another coat of paint. Peel-and-stick wallpaper goes up faster than the paste-down kind and pulls off cleanly if you change your mind later.
Measure each panel or shelf section, cut the paper slightly oversized, then trim it flush with a utility knife once it is pressed in place.
Traditional wallpaper paste works just as well if you already have a roll on hand; a dull knife tears the edges cleaner than scissors when you need a custom fit around shelves or trim.
Keeping the interior a light neutral helps if the outside is dark. Cream or off-white inside a cabinet painted charcoal or navy keeps the space from closing in, and the contrast frames whatever you put on the shelves.
If you do go with a busy pattern or a bold color on the backing, white plates and simple décor calm the arrangement down. Too much pattern competing with too much color turns a display into visual noise.
Which Parts to Paint and Which to Leave
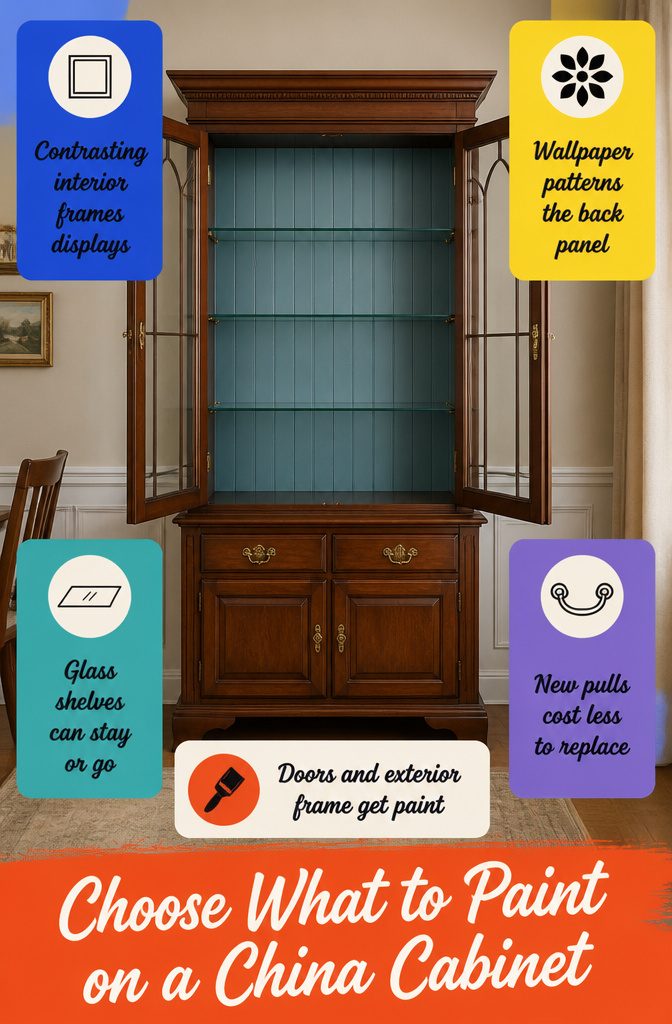
Not everything on a china cabinet needs paint.
The back panel and the interior shelves show the most when the doors are open, so painting the inside in a contrasting color turns the cabinet into a frame for what you display.
White works if the exterior is bold, a soft blue or gray if the piece sits in a neutral room, and a saturated red or green if you want the cabinet itself to be the focal point.
Wallpaper is another option for the back panel when you want pattern without committing to it everywhere else.
Glass shelves can stay clear or come out entirely if taller pieces need the vertical room.
Hardware gets swapped more often than painted, since new pulls cost less than stripping and refinishing old ones, but original brass or carved wood pulls are worth keeping if they suit the final look.
Doors and the exterior frame always get paint, but leaving the interior untouched keeps the contrast subtle if that fits the room better.
Frequently Asked Questions
What color should I paint the inside of my china cabinet?
White inside with a dark exterior keeps the interior from feeling heavy when the doors are open.
Red behind white dishes or a shade pulled from your wallpaper turns the inside into display space. Cream balances a darker outside finish without closing in the cabinet visually.
Should I paint the inside of my china cabinet?
Painting the interior in a contrasting color turns the cabinet into a frame for what you display.
The back panel takes color better than the shelves, which see more wear. You can leave the interior untouched if you want the contrast subtle.
What kind of paint should I use on a china cabinet?
Chalk paint covers well and distresses easily, though it feels rough until a topcoat seals it.
Valspar furniture paint with a slight sheen skips the chalky texture and gives a smoother result right out of the can. Zinsser BIN primer blocks tannin bleed when painting white or light colors over dark stained wood.
Can I just paint over my cabinets without sanding?
Some painters go straight to primer and count on a bonding formula to grip the surface.
That holds up on cabinets that sit still, but sanding with 220-grit paper takes 20 minutes and ensures the finish won’t lift when a plate knocks a shelf.
The finer grit roughs the surface just enough for primer to grip without tearing through thin veneer.
How do I modernize my china cabinet?
Paint the body in a dark color and leave the top stained, or split the piece with white inside and dark gray outside.
Swap old hardware for new pulls to shift the whole look without touching the finish. Add peel-and-stick wallpaper to the back panel for pattern, or paint the interior a contrasting color to frame what you display.
Can you paint over lacquer furniture?
Clean the lacquer with mineral spirits and a soft scrubbing sponge to cut through old wax and grease, then sand with 220-grit sandpaper to rough the surface for primer.
Zinsser BIN primer grips lacquer and blocks tannin stains from bleeding through later coats. Once primed, the cabinet takes paint the same way any other prepared surface does.